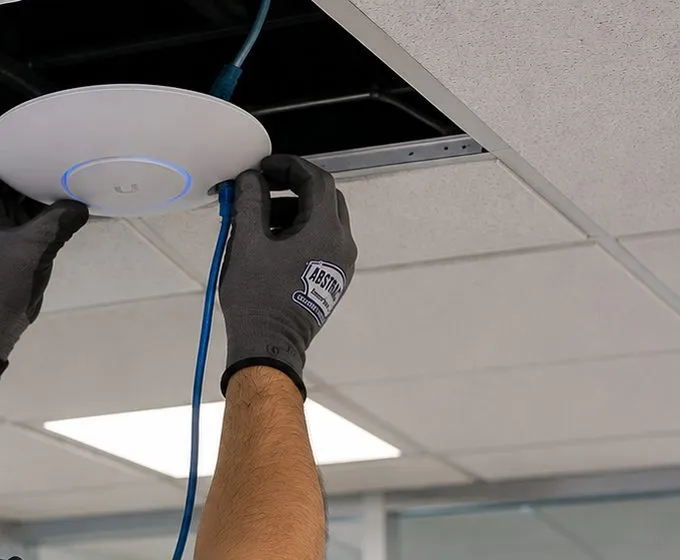
Pre-Wire While the Walls Are Open · Ceiling & Wall Speakers on Amp · Wired Backbone · Tuned at Trim-Out
Great Kills is rebuilding itself one house at a time. Ranches from the 1960s are getting second storeys, colonials are losing the wall between kitchen and dining room, and a few older houses are coming down altogether. Every one of those projects has a week when the studs and joists are bare — and that week is when ceiling speakers, in-wall speakers and a cable back to the router cost the least and hide the best. We plan Sonos around your contractor's calendar, run and test the wire before the drywall goes up, and come back at the end to drop in the speakers, tune each room and hand the system over.
Reviewed and updated October 17, 2026 · Written by Anwar Timothy, NYS licence #12000287431 · Booked through our Brooklyn office at 1282 Troy Ave
Send us the date the drywall is booked. In a Great Kills renovation that single date decides almost everything: whether speakers go in the ceiling or on a shelf, whether the far bedroom gets a network cable or relies on Wi-Fi, and whether the yard ever gets a wired zone. Phone the Staten Island line at (347) 934-8335 or fill in the form; a minute is enough.
In Great Kills, a Sonos project very often starts with a contractor's dumpster in the driveway. A March 2026 market report by Prodigy Real Estate put it plainly: there are "no tower cranes on the skyline" here, yet "block by block, older homes are being expanded, repositioned, and replaced." The same report walks through the three kinds of Buildings Department filing behind that change — ALT-1 major alterations that add rooms or rework the layout, ALT-2 interior renovations of kitchens, bathrooms and systems, and demolition permits where the old house comes down — and points to active filings on Hillside Terrace, Tennyson Drive and Armstrong Avenue. For a homeowner who wants music in the ceilings, that churn is good news. Speaker wire is cheap; getting it into a closed, finished wall is not.
The houses being reworked are mostly from one era. Brick Underground's guide to the neighborhood describes the detached and semi-detached houses as dating largely "to the 1960s and '70s," in styles that include ranches and center-hall colonials, and notes that they "typically have backyards, driveways, and garages." That is the generation that arrived after the Verrazzano–Narrows Bridge opened; Wikipedia's history of the area describes Great Kills and the rest of the East Shore as "mostly rural and dotted with shoreline resorts until the 1950s." One Reddit user remembered their parents buying in Great Kills about a year after the bridge opened, in a house that backed onto Kingfisher Pond. ABC7 New York summed up the result in December 2025: trees, lawns and single-family homes, "a corner of the city that looks more like Nassau County."
Those post-bridge houses were wired for the way families listened and watched sixty years ago. Their owners now want something else entirely: no visible wires, music in every main room, a television without a pile of boxes under it, and a network that reaches the bedroom over the garage. Robert DeFalco Realty's August 2026 buyer's guide lists what separates two similar Great Kills houses on price — "a renovated kitchen, newer mechanical systems, updated bathrooms, central air, modern flooring" — and every item on that list opens a wall or a ceiling. When the ceiling is down for new ductwork anyway, adding a speaker opening and a run of in-wall cable is a small line on a big job. When the ceiling was finished last month, the same speaker means cutting, fishing and patching.
That is why our Great Kills visits are usually two or three trips rather than one. The first is a walkthrough with the plans or with the framing bare, where we mark every speaker, every network drop and the closet or shelf where the Sonos Amp and router will live. The second is the rough-in: cable pulled, labelled, tested and photographed before insulation and drywall. The last comes after the painters, when the speakers go in, each room is tuned and the system is handed over. Houses that are already finished still get Sonos — on shelves, on brackets and through cable fished behind closed walls — but the cleanest results in this neighborhood come from catching the house while it is open.
Two more things shape the work here. The first is the neighbors. Lots are generous by city standards, but backyards still share fences, and music carrying over them has come up in the local Eltingville and Great Kills Facebook group, where one resident asked how others dealt with a neighbor "blasting music in their backyard." We set volume limits in the Sonos app and aim speakers into your own space as a matter of course. The second is the harbor. Blocks closest to Great Kills Harbor carry real flood exposure, and on those streets we plan where the Amp, the router and the switch sit before we plan anything else. Both points have their own sections further down.
Taken together, the numbers describe a neighborhood of big, mid-century wood-frame houses that change hands quickly and are being opened up at a steady pace. That combination makes Great Kills one of the best places in the city to build a wired Sonos system properly, provided someone is on site at the right moment.
Many Great Kills renovations add a network jack in every bedroom while the speaker wire goes in, because the same open walls serve both. Our Staten Island structured cabling crew runs those drops on the same visit, and the Great Kills soundbar installation page covers non-Sonos bars and the TV wall itself.
A new router from the internet provider, an electrician who moved the outlet the Amp was plugged into, or a speaker that was unplugged for painting and never rejoined: those are the usual reasons a system goes quiet just as a Great Kills renovation wraps up. Phone (347) 934-8335 for the next open 2-hour window. Most are working again within one to two hours of arrival, billed as a Staten Island setup-only visit at $225 for the first hour.
Nine kinds of work make up nearly every Great Kills booking. The first four depend on catching the house while it is open; the rest work in any house, finished or not.
We mark speaker positions, network drops and the equipment location on your architect's or contractor's drawings, so the framer knows where to leave a clear bay and the electrician knows where the Amp needs an outlet.
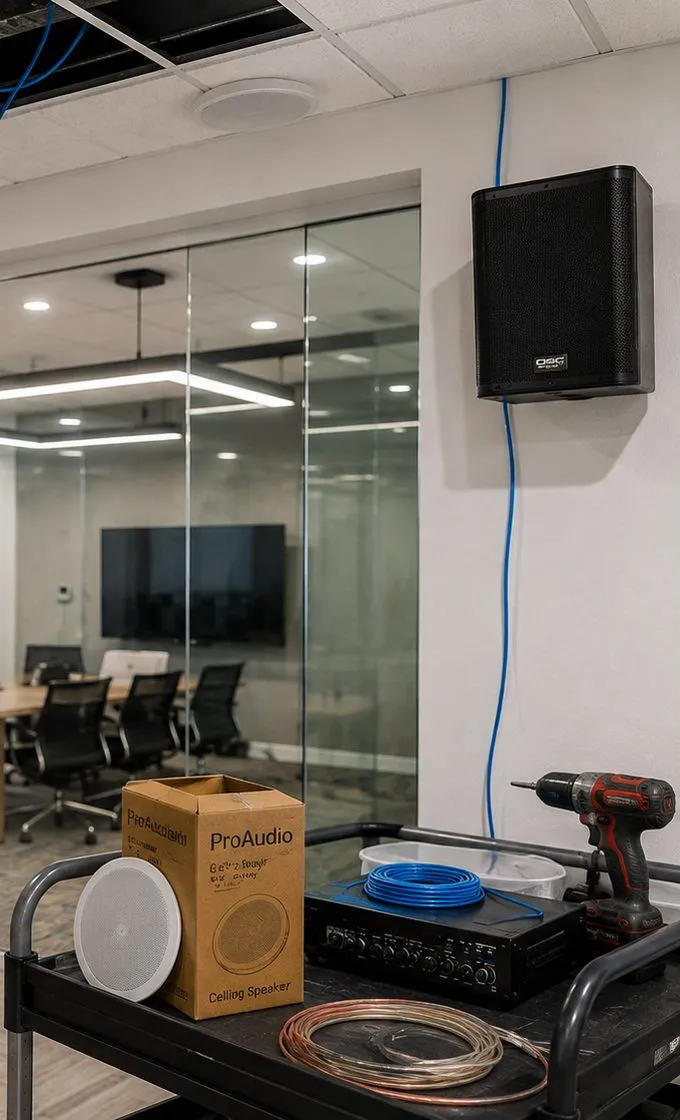
In-wall-rated speaker cable from each ceiling or wall position back to one equipment spot, labelled at both ends, with a bracket or ring marking every opening for the drywall crew.
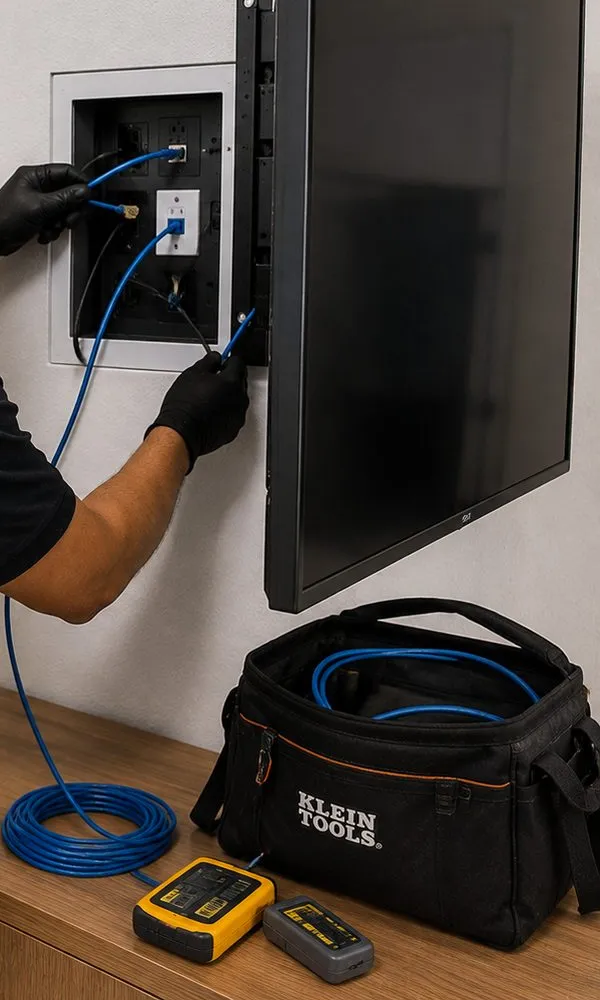
Network cable from the router to the TV wall, the Amp shelf and any room that needs a wired Sonos product or an access point — the part of the job that keeps the system steady once the walls are closed.
Every speaker run checked for continuity and shorts and every network run tested end to end before insulation and drywall, with photos of each wall so you know where the cables went.
After paint, the Sonos In-Ceiling or In-Wall speakers go into the openings, connect to the Amp, get detected in the app and are tuned room by room.
The bar under the screen, a Sub positioned by ear for even bass across the seats, and rear channels from a pair of Era speakers or in-wall speakers, all grouped as one home theater.
We bring the products you bought into one household, give each room the name your family uses, connect your streaming accounts, cap the volume where neighbors are close and tune whatever supports Trueplay.
Speakers that vanished from the app after a new router, a moved outlet or a paint job brought back online, regrouped and checked against the network.
Background music for stores on Amboy Road, waiting rooms on Hylan Boulevard and club rooms by the harbor, with the right cable above commercial ceilings and the volume kept inside the premises.
DeFalco's guide lists the styles a buyer meets here: traditional colonials, high ranches, broad ranches, Cape-style homes, split-levels, contemporary houses, semi-attached houses, townhomes and condos. Each opens up differently during a renovation, and each puts the Sonos equipment in a different place.
One long main floor over a basement or crawlspace, often with the bedrooms down a hallway at one end. An open basement ceiling is the easy highway for cable; the hallway is where a single ceiling pair can carry music between the living room and the bedrooms.
The split entry with the garage and a finished lower level below and the kitchen and bedrooms above. DeFalco notes these houses often have "flexible lower-level areas." The lower level is usually the den, which makes it the natural home for the Arc and Sub, with the Amp in a utility room beside it.
Two full storeys, a central stair and formal rooms either side. Renovations here tend to open the back of the house into one kitchen-family room. The central stair wall is the shortest route from basement to bedrooms, and we plan the cable around it.
A storey and a half, with bedrooms tucked under the roof slope. Reporting on City of Yes approvals described a Great Kills block "with many Cape-style homes." Knee-wall spaces upstairs are the usual cable route, and dormer additions are the moment to wire the upstairs ceilings.
Pairs of houses from the 1970s sharing one wall, with a deck and yard behind each half. We keep speakers off the shared wall and point them into your own rooms, so a renovation on your side does not become noise on theirs.
Where a demolition permit has cleared the lot, the new house goes up from a bare foundation. That is the one project where every speaker, every network drop and the equipment closet can be drawn on the plans before a single stud is set.
Homes on the streets nearest Great Kills Harbor, some rebuilt after Sandy damaged the shorefront. Here the first decision is height: the Amp, router and switch go on the main floor or above, never on the lowest level, and the speaker plan follows from there.
Attached homes and condominium units where the exterior and shared walls belong to an association. Interior ceilings are usually yours to open; anything that touches a party wall or the outside of the building needs the association's say first.
| House | Where cable travels | Where the Sonos gear usually lives | Wall surcharge most often met |
|---|---|---|---|
| Broad ranch | From the open basement ceiling straight up into the rooms overhead; the far bedrooms are reached over the attic | A dry corner of the basement, or failing that a main-floor hall closet | None on wood-stud drywall; +$45 where an old plaster wall survives |
| High ranch | Through the floor between the lower level and the main floor; the garage ceiling is avoided | Lower-level utility room or den cabinet | +$75 on the concrete or block foundation walls of the den |
| Center-hall colonial | Basement to second floor beside the central stair or through stacked closets | Basement or a closet off the family room | None on drywall; +$95 on tiled kitchen walls |
| Cape | Basement to first floor, then up through knee-wall space to the bedrooms | Basement or a first-floor closet | Usually none |
| Semi-detached | Along your own exterior walls and floors, never through the shared wall | Basement or under-stair cupboard on your side | +$65 on a brick fireplace wall |
| Teardown replacement | Anywhere the plans allow; ideally a short, straight run from every room to one closet | A dedicated, ventilated equipment closet | +$30 where metal studs are used |
| Harbor-side house | Down from the attic or across upper floors rather than up from a lower level that can flood | Main floor or above, on a shelf with air around it | Varies with the rebuild |
Wall surcharges in the last column are the flat add-ons on our published list, the same ones the Staten Island page uses; nothing is added for a wall that turns out easier than expected. All cable that stays inside a wall or ceiling is in-wall rated — CL2 or CL3 for speaker runs, as the National Electrical Code's Class 2 and Class 3 rules expect — and the exact route in each house is agreed with you at the walkthrough.
A Sonos pre-wire is not one appointment; it is a set of decisions made at fixed points in a renovation. Miss one and the choice is made for you. Here is how the stages of a typical Great Kills job line up with the audio work, from the first set of drawings to the week you move back in.
Before demolition, the architect or contractor has a plan. This is when we mark where speakers go, where the television will hang, where the Sonos Amp and router will sit, and which rooms need a network jack. The marks matter to other trades: the framer needs to know which joist bays to leave clear of blocking, the HVAC installer needs to keep ducts away from the speaker positions, and the electrician needs to put a dedicated outlet where the Amp and switch will live. Low-voltage cable is not the electrician's job unless you hire them for it, so it helps to have the audio plan on paper before anyone prices the electrical work.
Once the old drywall and plaster are out, the house shows its bones. We walk it again with the plan in hand, because what is behind a 1960s ceiling never quite matches the drawings: a beam where the architect expected a joist bay, a duct that took the space a speaker needed, a pipe running across the route to the basement. This is also the moment to confirm the furniture layout as far as anyone can, since speaker positions follow the seating more than the walls. Small changes now cost nothing; the same changes after drywall cost a patch.
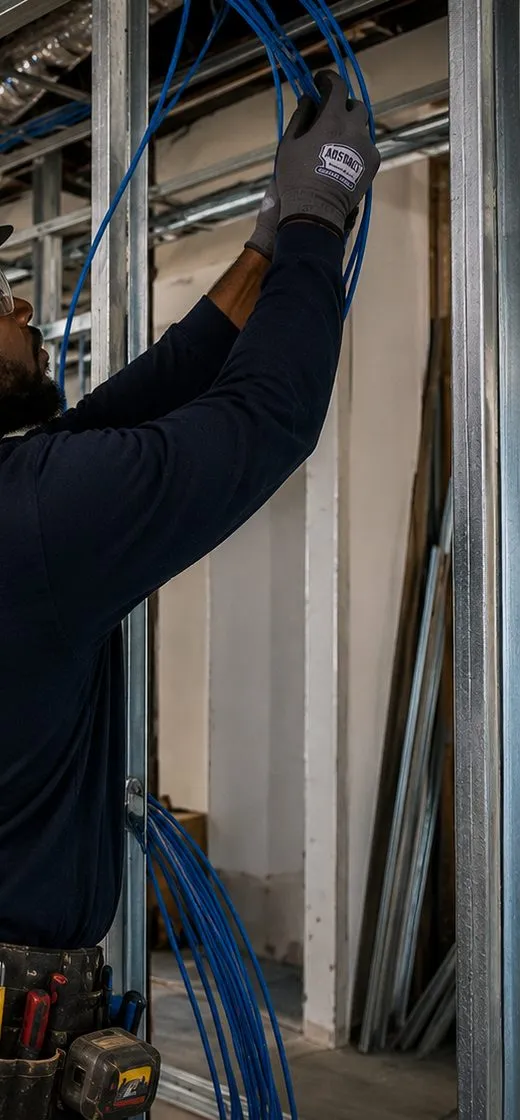
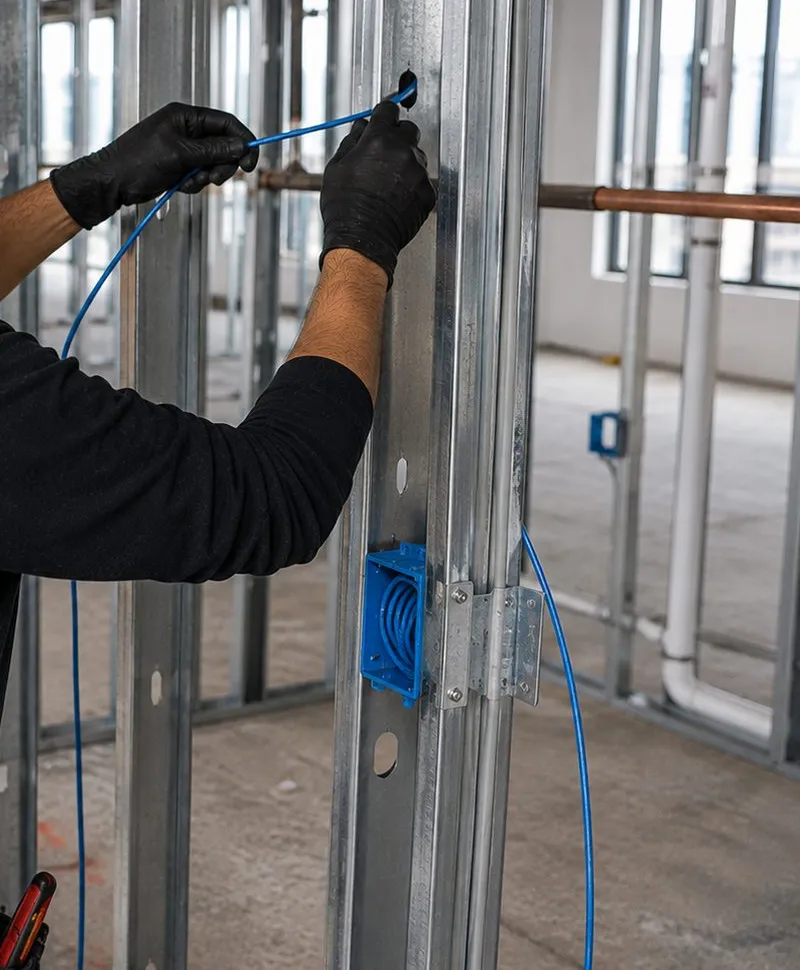
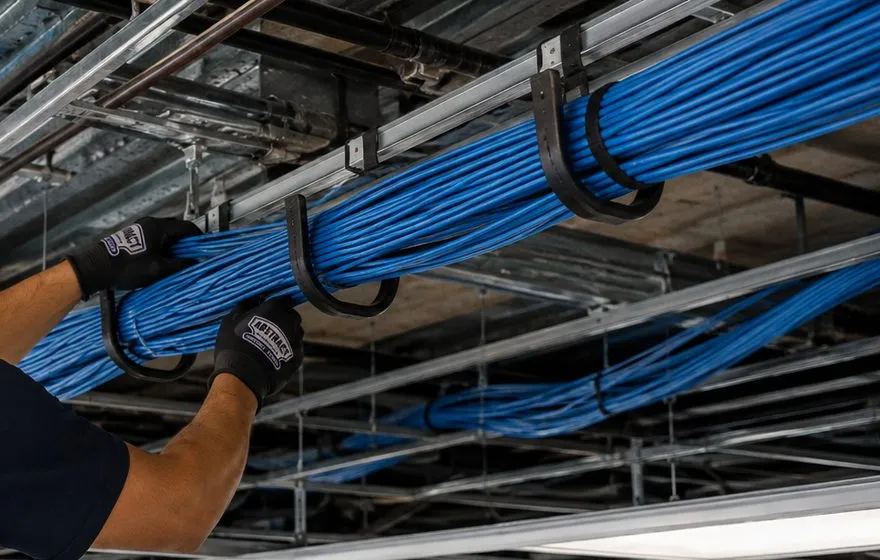
The rough-in is the core visit. Every speaker position gets its own run of in-wall-rated cable back to the equipment location, and every network drop gets a run back to the router or switch. Each end is labelled with the room and position, coiled and secured where the drywall crew will find it, and the openings are marked so nobody screws a sheet of board straight over them. Where the cable passes through framing, it is kept away from electrical wiring and away from where trim nails will go. Outside zones, if you want them, get their cable now too, ending in a weatherproof box at the wall rather than a hole that will be argued about later.
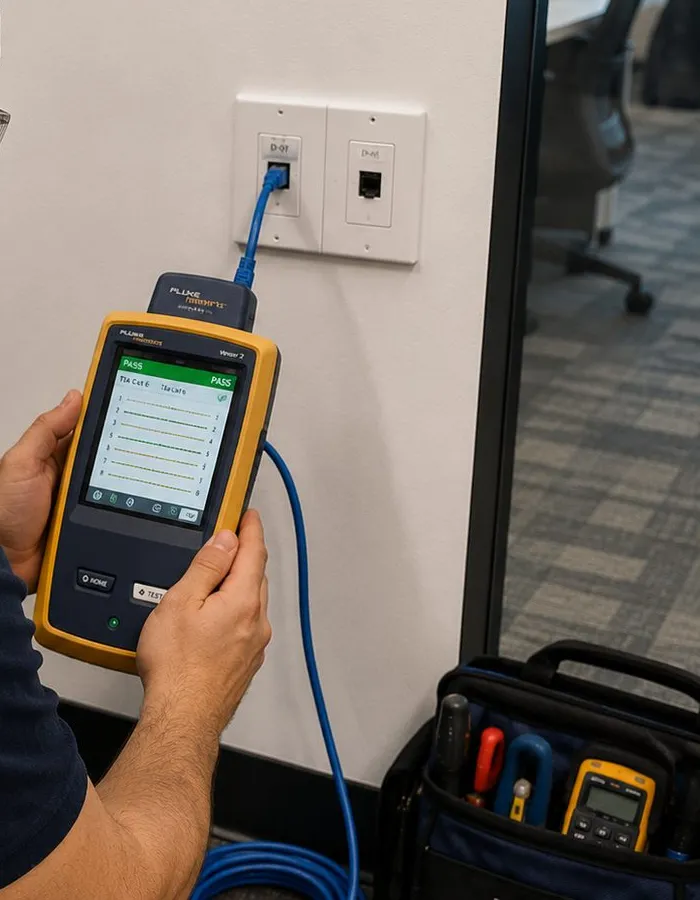
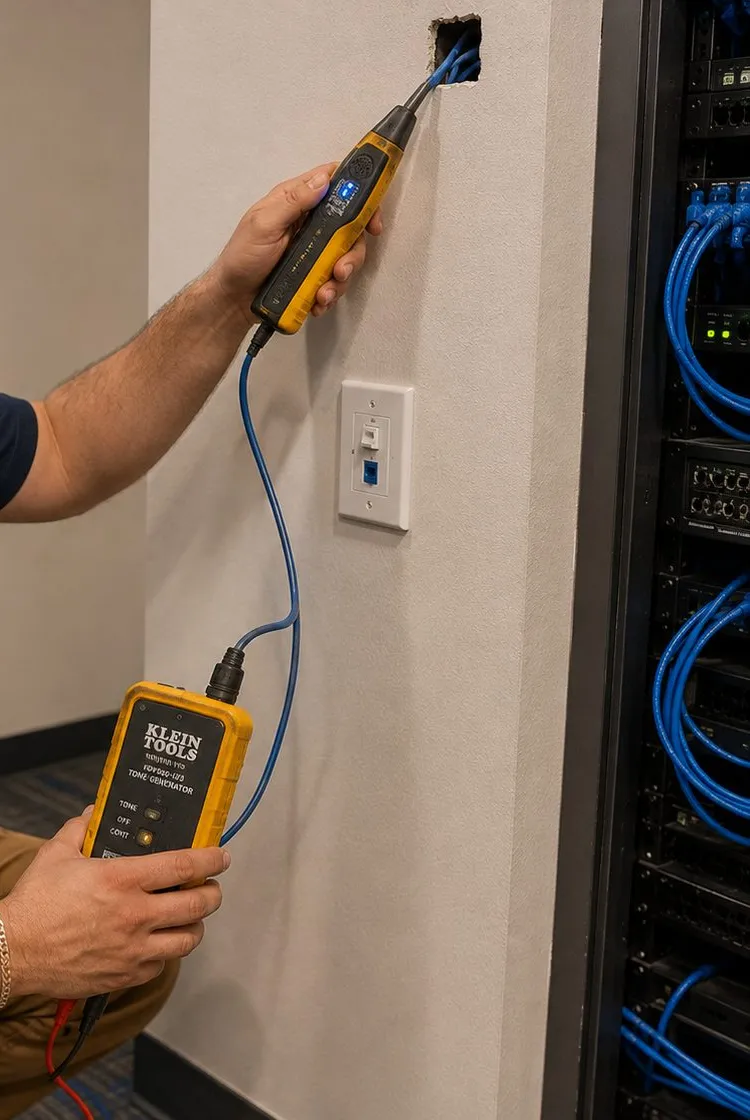
Before insulation and drywall go up, we test every cable: speaker runs for continuity and shorts, network runs end to end with a tester. Then we photograph each open wall and ceiling with the cable visible and label the photos by room. The test catches the run that was nicked by a staple or a screw while the wall is still open; the photographs mean that when someone hangs a picture or adds a shelf in five years, they know where not to drill. Other speaker makers make the same point — Sonance's manual for its invisible speakers asks for a listening check before any taping starts.
The drywall crew cuts the speaker openings where our marks are, or leaves the area clear for us to cut, whichever you and your contractor prefer. Through taping and sanding the wire ends stay coiled in their boxes or brackets, clear of dust. If the ceiling is painted after the speakers go in, Sonos's own installation manual says the speaker flange and baffle must be masked first; in practice we prefer to fit the speakers after the final coat and paint the grilles separately if you want them to match.
With paint dry and floors down, we come back for the finish visit. Speakers go into their openings and lock in place; the Amp goes on its shelf with air around it; the soundbar goes under the television; everything joins one Sonos system. With a Sonos Amp, the app can detect Sonos architectural speakers and unlock their tuning, and we run Trueplay in each room with the furniture in place. Volume limits go on any room that faces a neighbor, and the rooms are named the way your family talks about the house.
Two things commonly happen in the first month: the internet provider swaps the router, and someone moves furniture. The first can make Sonos disappear from the app; the second changes how a room sounds. We show you how to re-run Trueplay and leave a one-page note of the network settings the system relies on, so a new router can be set up to match. If the system still drops out, the setup-only rate applies, and the photographs from Stage 4 make any repair quicker.
| Renovation stage | Sonos decision made | What it costs to change later |
|---|---|---|
| Drawings | Speaker positions, equipment closet, Amp outlet | Nothing yet — it is a line on a plan |
| Open framing | Confirm joist bays, duct clearance, seating layout | Moving a mark |
| Rough-in | Every cable run and its route | Cutting, fishing and patching once the walls close |
| Pre-close test | Catch damaged runs | Opening a finished wall to find a fault |
| Drywall and paint | Openings cut, wire ends protected | Re-cutting a covered opening |
| Trim-out | Speakers, Amp, tuning, limits | A setup-only visit |
If your project is already past Stage 3, it is not too late for Sonos — it just changes which products make sense. A finished room still takes a soundbar, free-standing Era speakers, a wall-mounted pair on brackets, or in-ceiling speakers with cable fished from the basement or attic where the framing allows.
Great Kills does its business along a handful of streets. Brick Underground calls Amboy Road "the main commercial corridor"; Wikipedia names Hylan Boulevard and Arthur Kill Road as the other major commercial streets; and the harbor has its own cluster of clubs, marinas and restaurants along Mansion Avenue. Sonos suits the smaller rooms on all of them — a shop floor, a waiting room, a bar — where a full commercial sound system would be more than the space needs.
The neighborhood's main shopping street, anchored by supermarkets such as the Stop & Shop at 4343 Amboy Road and Top Tomato at 4045. DeFalco's guide lists restaurants, pizzerias, cafes, bars, delis and neighborhood businesses along it, and rooms like these often sit under suspended tile ceilings.
Staten Island's longest street runs along the south of the neighborhood, past the harbor and the park. Dental and medical practices, restaurants and service businesses along it often want quiet music in a waiting area and nothing in the treatment or back rooms.
The street of the Great Kills station and the public library, running up to Amboy Road. Short storefronts here usually need one or two speakers and a volume limit, not a zone plan.
Home to the Richmond County Yacht Club at 142 Mansion Avenue and the marinas Brick Underground describes along the western shore. Brick Underground also lists waterfront restaurants here, among them Cole's Dockside, a seafood house, and the Marina Café, open for more than four decades.
Where the Great Kills post office (1 Nelson Avenue) and the FDNY firehouse for Engine 162 and Ladder 82 (256 Nelson Avenue) stand, a short civic stretch; wherever a shop sits under apartments, here or on Amboy Road, the music has to stay downstairs.
Partly residential, partly commercial, and home to the Atrium Stadium Cinemas. Offices and showrooms here range from older storefronts to newer buildings, and each ceiling gets checked before we choose speakers or cable.
Most storefronts on Amboy Road and Giffords Lane are small enough that two ceiling speakers on a Sonos Amp, or a pair of Era 100 speakers on shelves, fill the room at a comfortable level. Bigger floors split into zones — front of house and back room, or dining room and bar — each with its own volume. Waiting rooms want even, low-level sound across the seats rather than one loud speaker by the desk. We size the system to the room and to the people working in it all day, not to the loudest moment of a Saturday.
These are the questions Great Kills homeowners and business owners ask us, grouped by where they come up: during an open renovation, at the framing and code stage, and in commercial rooms. Each answer is the short version of what we would tell you on a walkthrough.
Decide the one thing that rarely changes, and plan around it. In most living rooms that is the television wall: the doorways, windows and fireplace usually leave only one sensible place for the screen. Once that is fixed, the main seating faces it, and the speakers can be placed relative to the seating even if the exact sofa is not bought yet. Sonos's in-wall manual suggests a stereo pair 6 to 10 feet apart with the main listening position 4 to 10 feet away, which gives a generous window rather than a single point.
Where the room really could go either way, we hedge. A pair positioned for general music — spread across the middle third of the ceiling — sounds good from almost anywhere, and a second run of cable can be left coiled in the ceiling for a later surround position at very little cost while the framing is open. What we avoid is putting speakers tight to a wall or in a corner just because a joist bay happened to be clear there; sound from a corner speaker is boomy, and it is usually the one thing owners ask to move.
For background music across a kitchen, dining and living space, ceiling speakers are usually better. They spread sound evenly over a wide area, they stay out of the way of cabinets and art, and in an open plan they do not care which way people are facing. Most of the open-plan rooms we wire in Great Kills renovations get two or three ceiling pairs on one or two Sonos Amps.
In-wall speakers earn their place when the room has a clear front, usually around the television. Placed either side of the screen at ear height, they give a more focused stereo image than ceiling speakers, and Sonos In-Wall speakers have a pivoting tweeter to aim the sound. The manual's guidance for surrounds is side walls 2 to 6 feet behind the seats and 5 to 7 feet off the floor. Many renovated rooms end up with both: in-wall at the TV end for films, ceiling speakers over the kitchen and dining area for everyday listening.
Usually, yes. Sonos lists the cut-out for its 8-inch In-Ceiling speaker at 10.125 inches and the 6-inch model at 8.25 inches. Ceiling joists in houses of that age are most often spaced 16 inches on center, and because that measurement runs from the middle of one joist to the middle of the next, the clear gap between standard joists is roughly 14½ inches. Either cut-out fits with room to spare, provided the opening is centered in the bay.
What usually decides it is what else is in the bay: a duct, a pipe, blocking added for a light fixture, or a doubled joist under a wall above. During a renovation we can see all of that, and if the perfect position is blocked we shift the speaker along the bay rather than across the room. Depth matters in shallow spaces too — Sonos gives mounting depths of about 4.73 inches for the 6-inch model and 5.32 inches for the 8-inch — so a ceiling directly under a low roof deck gets checked before anything is cut.
Every speaker should. We run a separate cable from each speaker position back to the place where the Amp will live — a "home run" — rather than chaining one speaker to the next. It costs a little more cable during a renovation and saves a lot of trouble later. If a speaker fails, it can be tested on its own. If you later decide the dining room should play separately from the kitchen, the change happens at the Amp shelf instead of inside the ceiling.
Home runs also matter because one Sonos Amp drives a limited number of speakers: Sonos says it reliably powers up to three pairs of its architectural speakers wired in parallel. With every cable arriving separately, splitting the house across two or three Amps is a matter of how the ends are connected, not where the wires were pulled. The cable itself is in-wall rated speaker wire, the CL2 or CL3 type the National Electrical Code expects inside walls.
They can, but it is rarely the best wall. An exterior wall is packed with insulation and, in many houses, a vapor barrier on the warm side. Installers on home-theater forums point out that fitting an in-wall speaker usually means cutting into that barrier, and the speaker's open back then sits in the insulated cavity. Done carelessly, the result is a cold spot and a draft around the grille in winter, and a speaker that sounds dull because the insulation is pressed against it.
Our first suggestion is almost always an interior wall or the ceiling, which gives better sound and leaves the building envelope alone. If the exterior wall is the only place that works for the room — a front window wall where the TV must go, for instance — we raise it with your contractor before insulation, so the speaker positions are framed out and the insulation and vapor retarder are restored neatly around them rather than patched afterwards.
Each wire end is coiled and tucked inside a low-voltage bracket or ring at the speaker position, with the room and position written on it, so the drywall crew can find it and the tapers do not bury it. The openings are either cut by the drywall crew from our marks as the board goes up, or left for us to cut with the speaker template afterwards — you choose with your contractor. Either way, the openings stay empty through sanding, because fine drywall dust and new speakers do not mix.
Painting is the other hazard. Sonos's installation manual says that if a wall or ceiling is painted after the speakers are in, the speaker flange and baffle must be masked first. We prefer to avoid that by fitting the speakers after the final coat. If you want the grilles to match a colored ceiling, they are painted separately following Sonos's instructions and clipped on at the end.
Yes, if the speakers do not go into the separation. Many Great Kills houses from the 1960s have a garage built into the house, sometimes with a bedroom or den above. The New York City Building Code requires a private garage to be separated from the dwelling and its attic by at least 1-hour fire-rated construction, and garages under habitable rooms to be separated from those rooms by the same. A round hole cut for an in-ceiling speaker in that ceiling, or in the wall shared with the house, is an opening in the barrier the code requires.
So in a garage we keep to surface-mounted options: an Era 100 or Era 300 on a shelf or bracket, or a pair of passive speakers on wall brackets driven by an Amp that sits inside the house, with the speaker cable brought through in a way your contractor or electrician is happy meets the rating. If the garage is being converted into living space as part of the renovation, the rules for that room change with the plans, and the speakers go in once the new ceiling is built.
Yes. When the space above the ceiling tiles carries air back to the heating and cooling system, it counts as a plenum, and ordinary cable is not allowed there because of how it burns and the smoke it produces. The cable must be plenum-rated: CL2P or CL3P for speaker runs and plenum-rated network cable for any wired Sonos product. New York City enforces the 2020 National Electrical Code with local amendments, and plenum ratings are part of it.
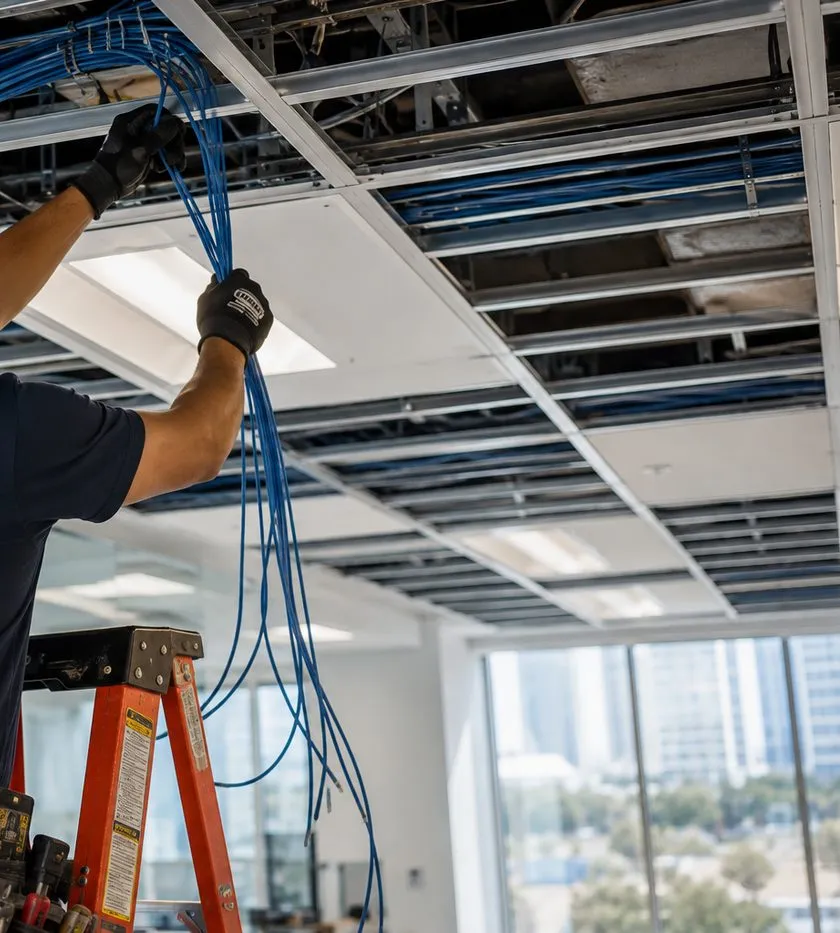
We look above a few tiles during the walkthrough to see how the ceiling is used, and the quote is written with the right cable from the start. If we find cable left behind by earlier tenants while we are up there, we will point it out, and you can decide with your landlord whether it comes out.
It can help, but it is one comfort measure, not a privacy system. The federal health-privacy rules accept that some conversation may be overheard, as long as the practice has "reasonable safeguards" in place; the Department of Health and Human Services gives speaking quietly in a waiting room as an example. Low, steady music in the waiting area makes it harder for people there to pick out words from the front desk or a nearby room, and patients tend to find it calming.
What music cannot do is replace doors that close, walls that reach the deck above, or a layout that keeps the waiting room away from treatment rooms. We set the waiting room as its own zone at a fixed level, keep speakers out of treatment rooms unless you want them there, and place them so they mask the reception desk rather than shouting over it. For anything beyond that, an acoustic consultant or a dedicated sound-masking system is the right call.
Not well, and we would not set it up that way. Sonos adds a delay to anything coming in through a line input so that grouped rooms stay in sync, and its app offers line-in delay settings from 75 milliseconds upward, with no zero option. For recorded music that delay is invisible. For a person speaking into a microphone in the same room, it means hearing their own voice a fraction of a second late, which is distracting at best and unusable at worst.
The better arrangement for a clubhouse or function room is a simple microphone amplifier and speakers of its own for announcements, with Sonos handling the background music. During an announcement the Sonos zone is paused or turned down from a phone, or automatically if the venue's sound equipment allows it. The two systems can share a space without sharing a signal, and each does what it is good at.
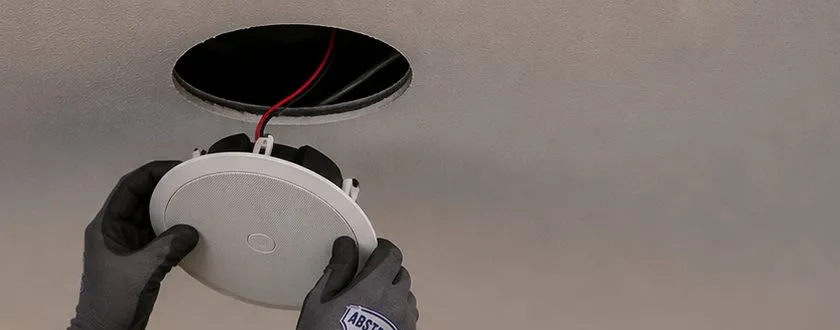
We install and set up the Sonos products you choose, bought from whichever retailer you prefer. In a Great Kills renovation the architectural products come first, because they are the ones that need the walls open; the rest can arrive any time.
The heart of a wired system: it powers passive ceiling, wall or outdoor speakers and joins them to Sonos. Sonos rates it to drive up to three pairs of its architectural speakers in parallel, and it has an HDMI connection for a television.
Six-inch and eight-inch round ceiling speakers with paintable grilles, cut-outs of 8.25 and 10.125 inches. The default choice for kitchens, open-plan living areas, hallways and bedrooms in a renovated house.
Rectangular wall speakers with a pivoting tweeter, best either side of a TV or as surrounds on the side walls. Their clamps grip wall material up to 1¼ inches thick, or 1⅝ inches with the caps removed.
The largest Sonos soundbar, for a big family-room screen. It detects when it is wall-mounted and adjusts its bass to suit, and it sounds best with a clear path to the ceiling above.
A mid-sized bar on HDMI ARC or eARC, right for a den on the lower level of a high ranch or a bedroom television, with room to add a Sub and surrounds later.
Sonos's entry bar. Because it connects by optical cable, it is the choice for a bedroom screen or any television old enough to have no HDMI ARC socket.
Stand-alone speakers for rooms that are already finished, for surround duty beside a soundbar, or for a garage workshop where nothing can be cut into the ceiling.
Bass units that pair with a soundbar or an Amp. Placement matters more than size: the Sub goes where it sounds even across the seats, kept clear of the wall a neighbor shares.
Keeps an existing receiver or stereo in service: the Port feeds it Sonos through analog or digital outputs and can switch it on with a 12-volt trigger, handy when the renovated family room keeps the old amplifier.
Rechargeable portables that sit in the house system over Wi-Fi and can be carried to the deck while a wired outdoor zone is still on the wish list.
We could not view Google's AI Overview for these searches from our build environment, so we have not quoted it. What follows are the claims that cost guides, product pages and forum answers make about Sonos and home audio — the same material answer engines draw from — set against what we find in Great Kills houses.
Sonos speakers stream over Wi-Fi, and many products need nothing but a power outlet. That is the message on the box, and it is true as far as it goes. It leaves out two things. The first is Sonos's own architectural range: ceiling and wall speakers are passive and need speaker cable to an Amp, and Sonos's guide to in-wall speakers says plainly that you will likely need a professional to cut the openings and run that cable.
The second is the network. Sonos's system requirements list wireless range extenders and powerline adapters among the things it does not support, and offer a wired connection from at least one product to the router as an option for a steadier system. In a long ranch or a three-level high ranch, that one cable is often the difference between a system that holds together and one that drops the far rooms.
A renovation is the cheapest moment to provide both. "Wireless" describes how the music travels between Sonos products; it does not mean a well-built system has no cable in the walls.
Homeowners are often told that audio is a finishing touch, to be sorted once the kitchen and bathrooms are done. For free-standing speakers that is fine. For anything in a ceiling or wall, the end of the project is the most expensive moment to start, because the walls that were open for months have just been closed, taped and painted.
Prodigy Real Estate's description of Great Kills ALT-2 renovations — "kitchens, bathrooms, systems" — is a list of exactly the trades that open ceilings. The speaker cable needs to go in during the same window, after framing changes and before insulation.
If the audio decision really cannot be made in time, the cheap insurance is to run cable to the likely positions anyway and leave it coiled behind the drywall at marked spots. It is far easier to ignore a cable you did not need than to fish one you did.
Angi's guide to whole-home stereo systems quotes $500 to $1,000 per room for multi-room additions, with labor at $50 to $100 an hour and wall or ceiling modifications at $100 to $500. Answer engines repeat ranges like these as if they were a price list. They are national averages for a generic system, and they say nothing about whether the walls are open.
Our published numbers work differently. Fixed jobs have fixed prices — Sonos setup at $125, a soundbar on the wall at $129, a cable run of up to 25 feet at $99 — and wired ceiling or outdoor zones fall within the $800 to $2,500 per zone range we publish for whole-home audio, with the exact figure written after a walkthrough. The biggest single factor in where a zone lands in that range is access: open framing at one end, a finished ceiling under a finished floor at the other.
That is why the quote for a Great Kills renovation is written against your contractor's schedule, not a per-room average.
Mesh systems are sold as the cure for dead spots, and they often help phones and laptops. Sonos behaves differently. Its requirements say every Sonos product and the app must be on the same network, and that if a wired setup is used with a mesh system, the wired Sonos product must connect to the primary mesh unit. Extenders that create a separate network are not supported at all.
In practice, the Great Kills houses with the steadiest systems have a wired backbone: a cable from the router to the TV wall, another to the Amp, and an access point or wired mesh node where the house turns a corner. A renovation is when those cables are easy to run.
Mesh is not the enemy — it simply works best for Sonos when the units are linked by cable rather than by air, which again comes back to having the walls open at the right time.
Online guides tend to treat ceiling speakers like recessed lights: find a joist bay, cut a hole. Angi notes that ceiling joists are typically 16 or 24 inches on center, and Sonos's cut-outs fit comfortably between either. Fitting is not the same as sounding right.
A speaker placed tight to a wall or in a corner sounds boomy; a pair placed too close together sounds like one speaker; a pair placed for the dining table may miss the sofa entirely. Sonos's manuals give spacing guidance for a reason — stereo pairs 6 to 10 feet apart, at least 2 feet from side walls.
We plan speaker positions from the seating first and then look for the joist bay that allows it, moving along the bay if a duct or pipe is in the way rather than giving up the position.
Garages look like the simplest room to wire: unfinished, uninsulated, no one minds a hole. In an attached Great Kills garage the opposite can be true. The New York City Building Code requires 1-hour fire-rated construction between a private garage and the dwelling, and between a garage and any habitable room above it.
That ceiling and that shared wall are not places for speaker openings or casual cable holes. Surface-mounted speakers and Era products on shelves give the garage music without touching the separation.
Advice that treats the garage as a blank space misses a rule that matters more in this neighborhood's built-in-garage houses than almost anywhere else in the city.
Setup guides put the Sonos Amp and router wherever the cable is shortest, often the basement. Near the harbor that is a gamble. First Street estimates that 1,230 Great Kills properties — 14.4 percent — have some risk of flooding over the next 30 years, and DeFalco's checklist for harbor-area buyers includes "location of mechanical systems."
On those blocks we put the Amp, router and switch on the main floor or higher, on a shelf with air around it, and run cable down to the speakers rather than up to the gear.
Even away from the water, Sonos asks for at least 18 inches between its products and other electronics to limit interference, so the "anywhere" answer rarely holds up once the cabinet is full.
Tell us the stage your Great Kills renovation is at and the date the drywall is booked. We'll mark the plan, time the rough-in and write the price before anyone cuts a hole.
A few details price most Great Kills jobs: the style of house, which rooms are open or being opened, when the drywall goes up, and the Sonos products you have or plan to buy. The written plan and total come back the same business day. To talk it through instead, phone (347) 934-8335.
Thank you — your Great Kills request is with an installer today. If it can't wait, call (347) 934-8335.
Seven steps for a renovation pre-wire. A house that is already finished skips the second, third and fourth and goes straight from the plan to the trim-out, with any cable fished through closed walls.
From your drawings or a first walkthrough we mark every speaker position, network drop and the equipment location, and note the outlet the Amp will need. The marked plan goes to you, your contractor and your electrician, priced from the Staten Island list.
Once demolition is done we walk the house again and check each mark against the real joists, beams, ducts and pipes, moving speakers along a bay rather than across the room if something is in the way.
In-wall-rated cable goes from each speaker position and network drop back to the equipment spot, labelled at both ends, with brackets or rings marking each opening for the drywall crew.
Before insulation and drywall, every speaker run is checked for continuity and shorts and every network run is tested end to end; then each open wall and ceiling is photographed and labelled.
With paint dry, the speakers go into their openings, the Amp goes on its ventilated shelf, the soundbar goes under the TV and every product joins one Sonos system.
Architectural speakers are detected in the app, Trueplay is run in each supported room with furniture in place, and volume limits go on rooms that face a neighbor.
We label each room in the words your household already uses, log in your streaming services, walk you through grouping, volume limits and re-tuning, and leave a short written note of the network settings so a replacement router can be matched.
We work on every block between Richmondtown and the harbor, and between Bay Terrace and Eltingville — the boundaries Brick Underground gives for the neighborhood. These six places are the ones residents use to say where they live.
About 523 acres on the bays south of the harbor, built up on fill placed between 1944 and 1948 and handed to the National Park Service in 1972. Roughly 282 acres stay fenced while the radium clean-up runs its course; the lifeguarded beach, the multi-use path and the boat launch remain open.
The sheltered harbor that gives the neighborhood its southern edge. Nichols Marina, on the western side of the park, lost its slips in Sandy and was rebuilt; SILive reported in 2015 that 130 of the new 250 slips were already taken when it fully reopened.
A family yacht club established in 1923 on the harbor's western shore, whose first clubhouse was a two-storey houseboat. Brick Underground describes its deep-water pier with 40 berths.
The Staten Island Railway stop near Amboy Road, once called Giffords after the local surveyor Daniel Gifford whose name also stayed on the street. Express trains run to St. George at rush hours and locals around the clock.
The New York Public Library branch, opened in 1927 as a one-storey building and replaced in 1954 by the present three-storey building, which was fully renovated in 2005 and has a lower level for community events.
Side by side, and the center of a Great Kills summer. The private swim club belongs to more than 500 families and hosted the interclub meet against Village Greens in July 2026; the Little League co-hosted a 2026 New York State tournament the same month.
We also install Sonos in the neighboring parts of the South Shore — Eltingville, Bay Terrace, Arden Heights, Annadale, Richmondtown, Oakwood and New Dorp — and across the rest of the borough from the Staten Island Sonos installation page.
Great Kills is priced from the Staten Island list, line for line. The Sonos, soundbar and wiring prices are the same dollar amounts we publish in every borough; the Staten Island differences are the hourly setup rate and the TV-mounting base. Anything that depends on the walls — ceiling and wall speakers, outdoor zones, cable between floors — is written up after a walkthrough, and in a renovation that walkthrough happens with the framing open. If the job changes on the day, you see the new figure before any work is done.
| Item | Price | What it covers |
|---|---|---|
| Sonos setup | $125 | Every speaker on a single household in the app, each room labelled, streaming accounts signed in, tuning run on supported products |
| Soundbar wall-mounted under the TV | $129 | Your Sonos bar hung beneath the screen on a bracket, levelled, cabled and tested with the TV remote |
| Soundbar placed on a console | $79 | Set in place, connected and checked |
| Sanus soundbar bracket | $84.99 | If you have no suitable mount for the bar |
| In-wall concealment | $169 | For a TV wall that is already painted: a recessed kit, built to code, carries the power and HDMI down inside the cavity |
| Paintable cord cover | $59 | Surface raceway where the wall cannot be opened |
| Cable run to a cabinet or other spot | $99 | One cable, 25 ft at most — in a Sonos job it is usually the wired link from router to bar or Amp |
| A/V receiver | $129 | Receiver connected and configured, for example through a Port |
| Universal remote | $99 | Programmed for the TV, Sonos and sources |
| Streaming device | $49 | Per device |
| Full home theater | $350 | A multi-component system connected and set up as one |
| Outdoor speakers on Amp (deck, patio, pool) | Quoted at walkthrough | Within our published $800–$2,500 per zone range for whole-home audio |
| In-ceiling or in-wall speakers on Amp | Quoted at walkthrough | Same published per-zone range; open framing sits at the lower end |
| Floor-to-floor cable, access point, Amp location | Quoted at walkthrough | Depends on the route, the walls and the distance |
| Condition | Add | Where we meet it in Great Kills |
|---|---|---|
| Drywall on wood studs | $0 | Nearly every room in the 1960s–70s ranches and colonials |
| Metal studs | +$30 | Some commercial fit-outs and new construction |
| Plaster | +$45 | The occasional older house that predates the post-bridge boom |
| Brick or stone | +$65 | Fireplace walls and brick-faced houses |
| Concrete or cinder block | +$75 | High-ranch dens and foundation walls on the lower level |
| Tile or marble | +$95 | New kitchen backsplashes and bathroom walls |
| Plywood backer board | $85 | Spreading a heavy load where the framing is irregular |
| High mount (above about 8 ft) | $75 | Vaulted family rooms in additions and two-storey entries |
| Walk-up, 3rd floor and above, no elevator | $40 | Rare here; some apartments over shops |
| Box removal | $25 | We take the packaging away |
| Certificate of insurance | Free | Contractors, townhome associations, landlords and plaza managers |
Our pricing model puts Staten Island at 1.10 times the Brooklyn base, and on the published list that shows up in two places. A setup-only visit — no mounting, just reconnecting speakers after a router change, regrouping rooms or tracking down dropouts — is $225 for the first hour, then 30-minute blocks. A TV mount on the same visit starts at $209.99 for 32 to 55 inches on a fixed or tilt bracket over wood-stud drywall, with 56–65 inches adding $30 and 66–75 adding $60. Every line is on our Staten Island TV mounting prices page. No bridge toll, travel or mileage charge is added.
Three fixed bundles cover most first visits in Great Kills houses that are already finished. Each card shows its arithmetic; any wall add-on from the tables above goes on top. Renovation pre-wires are quoted separately, because the price depends on how many positions are open.
$224
One wired anchor for the whole system: a cable run of up to 25 ft at $99 from the router to a single Sonos product, with the $125 setup, for $224. It is what we suggest when the bedroom at the far end of a ranch keeps dropping out.
$413.99
Made for the den at the bottom of a high ranch, where the TV wall is block: bar on the wall $129, Sanus bracket $84.99, block surcharge $75 and setup $125, for $413.99. The same visit on plain drywall comes to $338.99.
$732.99
$732.99 is the sum of four list lines: $350 to connect the whole theater, $129 to hang the bar, $84.99 for its Sanus bracket and $169 to bury power and cable in a finished wall. The result is a renovated family room with bar, Sub and rears where no cord shows.
Plenty of owners buy the matching Sonos mount with the soundbar. In that case you pay labor only: $129 to put the bar on the wall plus any wall add-on, and $125 if we also set up the system — $254 for the pair on drywall. A bracket you supply must be rated for the bar and stays under its maker's warranty; if it does not suit the wall we find, you hear so before anything is drilled, and the $84.99 Sanus bracket is the fallback.
A pre-wire is priced by position, not by package: how many ceiling and wall speakers, how many network drops, how far each run travels and whether the framing is open. Each wired zone falls inside the $800 to $2,500 per zone range we publish for whole-home audio, and the written quote after the walkthrough fixes your number before cable is ordered.
Screen and sound in one trip. A 65-inch television on drywall starts at the $209.99 Staten Island mount price and its size adds $30, making $239.99; hang a Beam under it for $129, add the $125 Sonos setup, and the trip comes to $493.99, extras aside.
House style, the rooms being opened, the drywall date and the products on your list are all we need. The written plan and price come back the same business day.
On the streets closest to Great Kills Harbor, the speaker plan starts from a different question: where will the electronics be safe? First Street estimates that 14.4 percent of Great Kills properties — 1,230 of them — have some risk of flooding over the next 30 years. Wikipedia notes that the shorefront needed extensive work after heavy damage in Hurricane Sandy, and Nichols Marina lost its slips. DeFalco's checklist for buyers near the harbor includes FEMA flood-zone status, elevation and the "location of mechanical systems." A Sonos Amp, a router and a network switch are mechanical systems in miniature, and they deserve the same thought.
The usual habit is to put equipment in the basement and run cable up. On harbor blocks we reverse it. The Amp, router and switch go on the main floor or higher — a hall closet, a cabinet in the family room, a shelf in an upstairs linen closet — and the speaker cable runs down to ceilings and out to the yard. The cable itself does not mind water nearly as much as the electronics do, and a low-voltage cable that gets wet in a storm is far cheaper to replace than an Amp.
A closet that holds the Amp, router and switch needs a dedicated outlet, room to breathe and a little space between products; Sonos asks for at least 18 inches between its products and other electronics to limit wireless interference. During a renovation, the electrician can put that outlet exactly where the plan shows, and the cabinet maker can leave a ventilated shelf instead of a closed box.
In July 2026, SILive reported that Con Edison asked about 41,200 customers in West Brighton, Great Kills and Richmond Valley to conserve power during repairs. A Sonos system draws little, but it does depend on the router, and both come back on their own when power returns as long as they are not sitting in water. Keeping the network gear on a higher floor is the simplest protection there is.
Floor plans vary, yet the houses built after the bridge tend to stack the same way from garage to bedrooms, and a Sonos system follows that stack.
In a high ranch the lower level holds the garage, a den and often a utility room; in a ranch or colonial it is the basement. The den is a natural home for a soundbar and Sub. Away from the harbor the utility room can take the Amp and router; near it, they move upstairs. The garage gets free-standing or surface-mounted speakers so the fire separation stays intact.
Kitchen, dining and living spaces, increasingly opened into one room by renovation. This is where ceiling speakers on one or two Amps make the most sense, split into zones so the kitchen can play quietly while the television runs at the other end.
Upstairs in a colonial or Cape, down the hall in a ranch, up the half-flight in a high ranch. Bedrooms rarely need more than one speaker or a small ceiling pair, but they are the rooms most likely to lose Wi-Fi, so a network cable to the upstairs hall for an access point is often worth more than the speakers themselves.
More than one of the sample listings in Brick Underground's guide has a deck, and the guide notes that the houses typically come with backyards. A wired outdoor zone on an Amp, or a portable Move 2 that lives indoors and goes outside when needed, both work. The cable for a wired zone is easiest to run during the renovation, ending in a weatherproof box at the outside wall, and the volume limit keeps the music on your side of the fence.
Owners opening walls for speakers usually fix more than the sound while they are at it. These related services each have their own page.
The borough page this one belongs to: Sonos installation across Staten Island, with yards, decks and raised houses.
Our Great Kills soundbar installation page handles other brands of bar and the TV wall itself.
TV installation on Staten Island and the price list behind it.
Structured cabling, Staten Island — a jack in every room while the walls are open — and Cat6 installation.
Network installation for access points and switches, and low-voltage installation on Staten Island.
AV and sound installation for larger systems and home automation.
Smart lock installation on Staten Island, often fitted with the new front door in a renovation.
Scheduling, return trips and cover are on our warranty page.
These are working notes from the installer's side of a walkthrough rather than a story about one house. On a Great Kills renovation the first thing we ask for is the drywall date, because everything else is scheduled backwards from it. The second is the electrician's plan: if the Amp closet has no outlet on the drawings, it is far easier to add one now than after the panel is closed up.
Then we look up. In the post-bridge ranches and colonials the basement ceiling is sometimes still open or covered only by tiles, which makes it the easiest highway in the house; we trace where the main beam runs, where the ducts cross and which joist bays lead cleanly to the rooms above. In a high ranch we check the floor between the den and the main level and steer clear of the garage ceiling. In a Cape we open the knee-wall doors. On a harbor block we ask about the last storm before deciding where the equipment will live.
Finally we stand where the family will sit and point to where the speakers should be — before anyone looks for a convenient joist bay. Most of the changes we make to a plan happen in that moment.
Almost always. With the framing open, a speaker run is a matter of pulling cable through bare studs and joists and marking the opening; once the drywall is taped and painted, the same run means locating framing, cutting, fishing cable through closed bays and leaving a patch for your painter. We do not publish a per-speaker price for either, because both depend on the route, but every wired zone falls inside our published $800 to $2,500 per zone range and open framing sits toward the bottom of it. The written quote shows the difference for your house.
Yes, and it is the best place to start. Send the floor plans and reflected ceiling plans if you have them, along with where the television and main seating are likely to go. We mark every speaker, network drop and the equipment location, note which joist bays need to stay clear and where the Amp needs an outlet, and send the marked plan back for your architect, contractor and electrician. The marks are then checked against the real framing once demolition opens the house, because 1960s ceilings rarely match the drawings exactly.
Either works, and the choice is yours and your contractor's. Some drywall crews prefer to cut the openings as each sheet goes up, using the brackets and marks we leave; others would rather hang full sheets and let us cut afterwards with the speaker template. What matters is that the openings are agreed before the board goes up, the wire ends are left where they can be found, and nobody sands or paints over a bracket. We confirm the method with your contractor at the rough-in visit.
Yes, and we do it on every pre-wire. Before insulation and drywall, each speaker run is checked for continuity and for shorts between conductors, and each network run is tested end to end. Any run that fails is replaced while the wall is still open. We then photograph every open wall and ceiling with the cables visible, labelled by room, and send you the set, so the route of every cable is on record when the walls are finished.
It happens: a drywall screw through a cable, a trim nail in the wrong place, a cable cut when a plumber reroutes a pipe. Because every run was tested and photographed before close-up, we can show where the cable was and that it worked, which usually settles who is responsible. The repair itself is billed at our Staten Island setup-only rate of $225 for the first hour and 30-minute blocks after that, plus any cable or patching needed, and we tell you the likely scope before starting.
Great Kills is one neighborhood chapter of our Staten Island Sonos page, and that borough page reports up to the New York City Sonos hub. Below is the full set of Sonos pages, region by region.
Great Kills sits beside Country Club in the Bronx, City Island, Douglaston in Queens, Astoria, Cobble Hill in Brooklyn, Upper East Side, Manhattan, Park Slope, Brooklyn, Forest Hills, Queens, Riverdale, Bronx, Todt Hill, Staten Island, Greenwich Village, Manhattan, Grymes Hill, Staten Island, Battery Park City, Manhattan, Ditmas Park, Brooklyn; its parent is the Staten Island borough page.
NYC Sonos installation · Staten Island · Brooklyn · Manhattan · Queens · the Bronx
Long Island Sonos installation · Nassau County · Suffolk County
Sonos installation in the Hudson Valley · Westchester · Rockland · Orange · Putnam · Dutchess · Ulster
AESS also installs cameras, intercoms, door access and networks; visit the Abstract Enterprises Security Systems home page or read about the company before you book.
Nothing local on this page is guesswork: the streets, numbers and landmarks trace back to the publications below, and every dollar figure is taken from the AESS Staten Island price list.
When music stops in a Great Kills house that worked last week, look first at what changed: the provider's box, an outlet, a speaker someone unplugged to paint behind it. Ring (347) 934-8335 and the next free 2-hour slot is yours; the usual fix takes an hour or two once we are through the door.
Abstract Enterprises Security Systems · 1282 Troy Ave, Brooklyn, NY 11203 · (347) 934-8335 · WhatsApp (718) 679-0359 via wa.me
NYS Low-Voltage Licence #12000287431 · 100% Licensed & Insured · Same-Day Estimates · Rated 4.7★ from 201 Google Reviews
Sonos products carry their manufacturer's warranty. Full terms — including 50% deposit, one-year parts-only warranty on AESS-supplied products, and the late-fee schedule — are set out in the service agreement. See our warranty page.
Page reviewed and updated October 17, 2026. Changelog: Great Kills page launched as a neighborhood child of the Staten Island Sonos page, covering renovation pre-wires in 1960s–70s ranches, high ranches, colonials and Capes, garage fire separation, harbor-side equipment placement and business music on Amboy Road, Hylan Boulevard and the harbor.