NYC Parking Lot Security

Parking Lot Camera Installation NYC

Design, installation, repair and modernization of camera systems for open lots, parking garages, dealership inventory lots, and mixed-use parking in New York City — LPR entrance coverage, pole-mounted 4K cameras, concealed cabling and live monitoring, engineered from a free on-site survey.

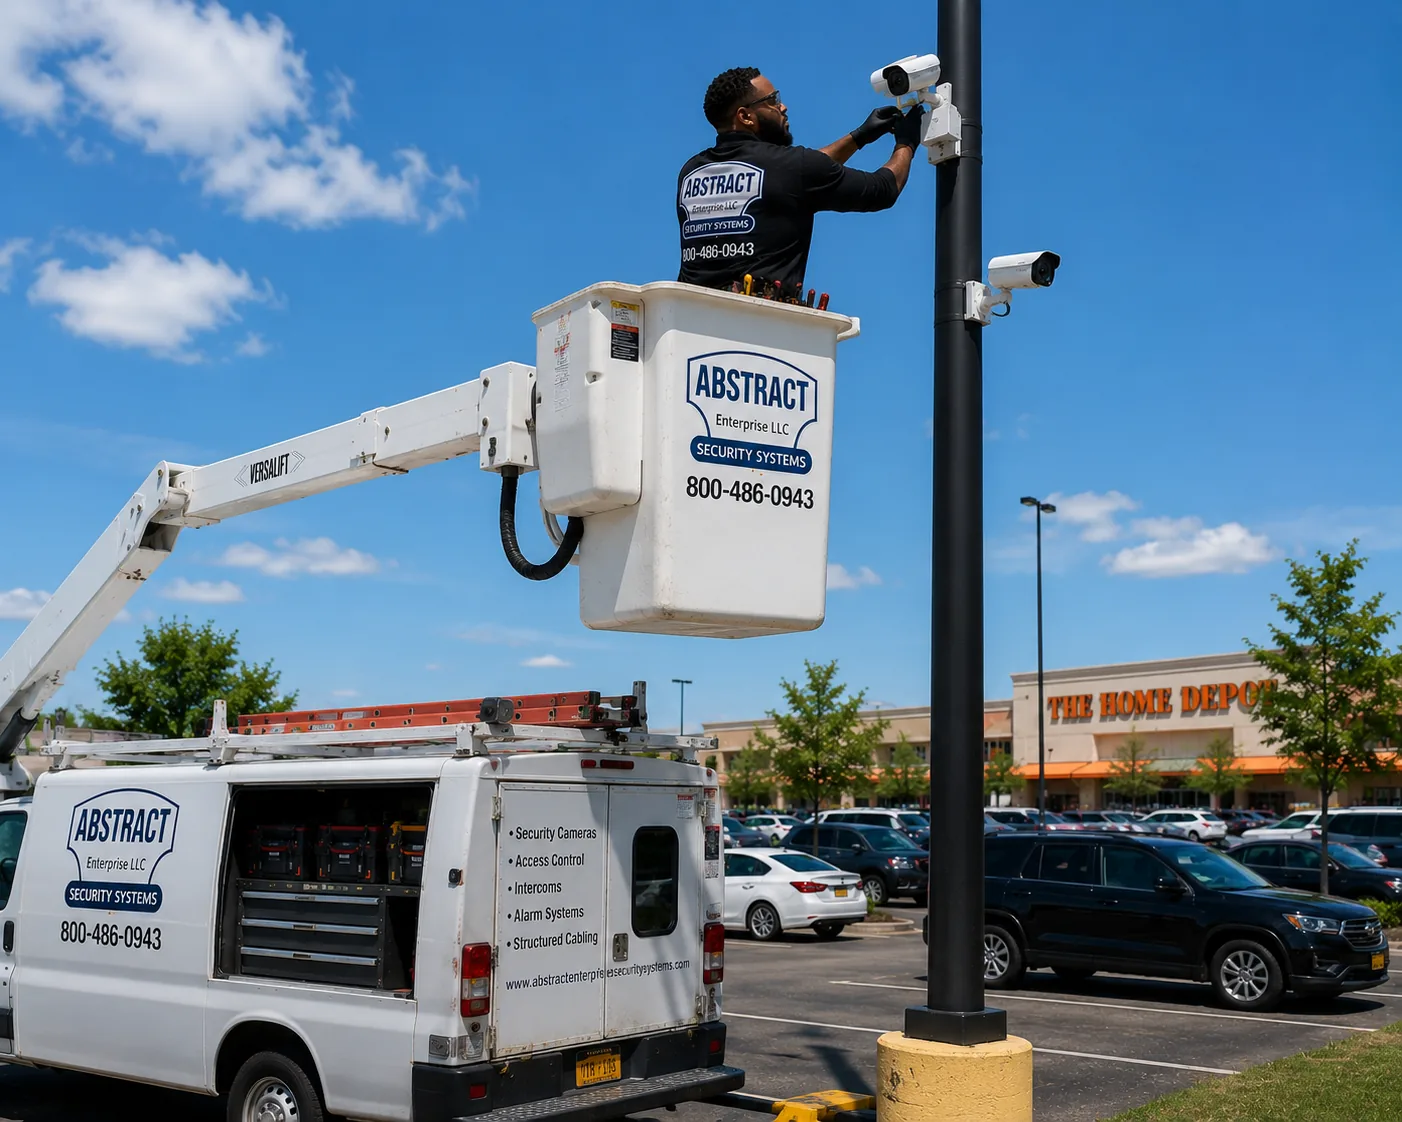
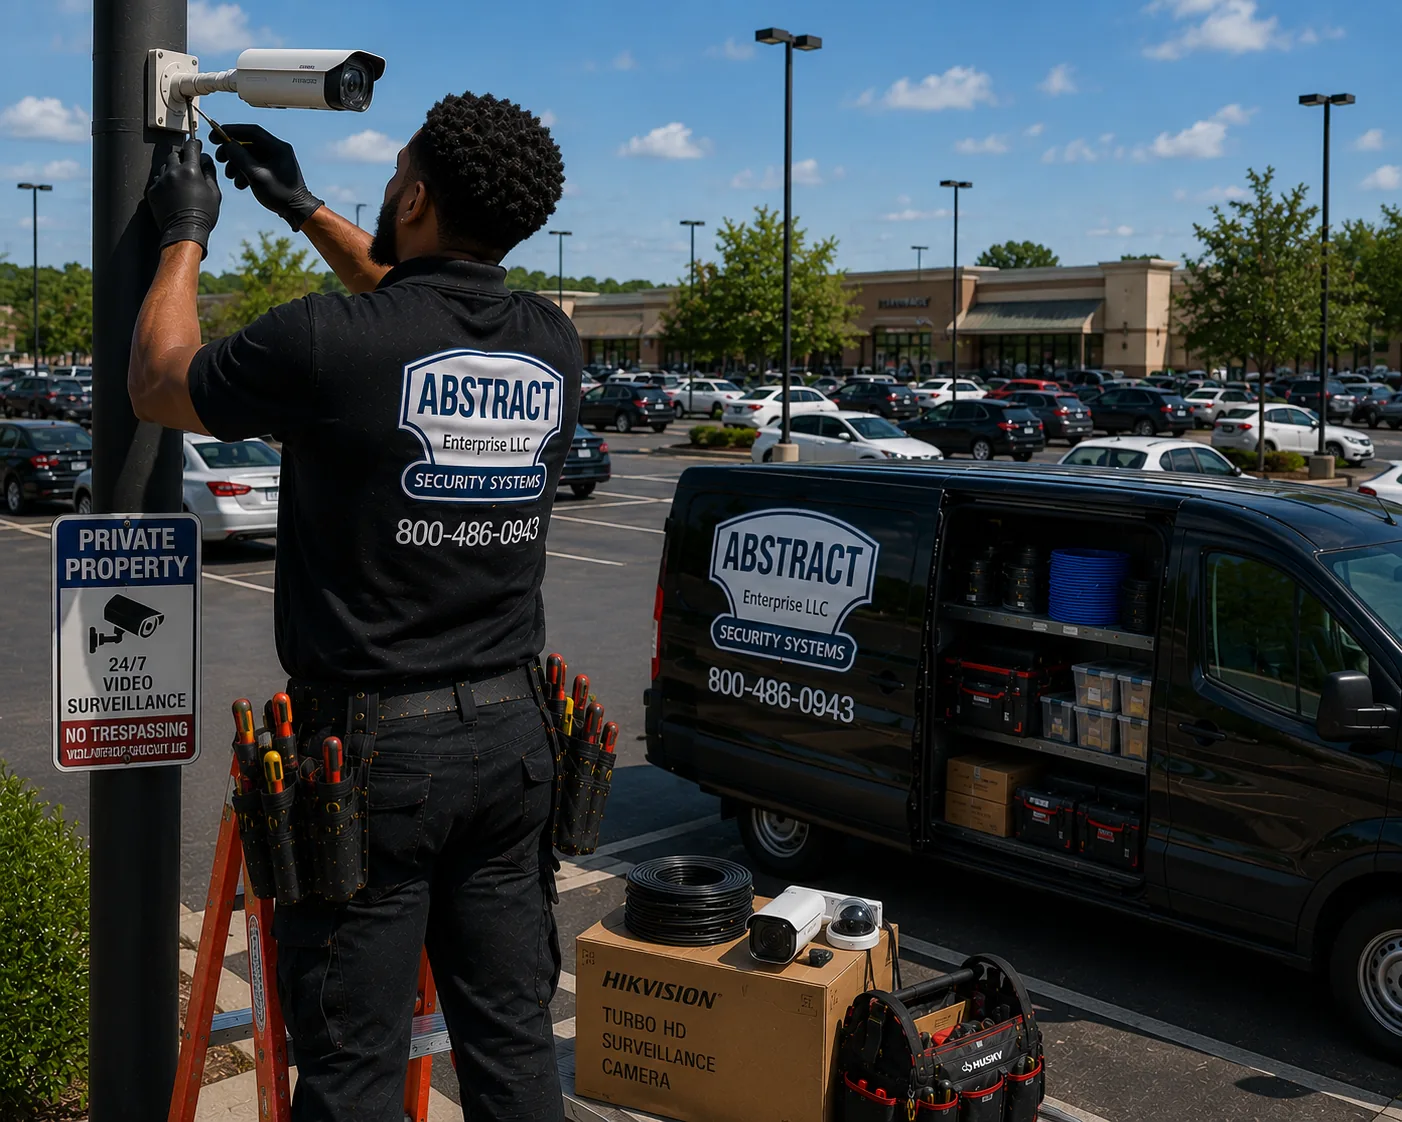
Abstract Enterprises technician working from a bucket lift to mount two bullet cameras on a parking lot light pole above a busy retail lot
Parking lot camera installation in NYC: bucket-lift access lets a technician set two fixed bullet cameras high on an existing lot pole, where the sightline clears parked vehicles.

★ 4.7 · 201 Google Reviews  |  NYS Low-Voltage License #12000287431  |  Free on-site survey

Service is available throughout New York City.

Request a Free Parking Lot Survey

Camera Systems Built Around How Parking Lots Actually Work

A parking lot is one of the hardest environments a camera system serves. Distances are long, lighting is uneven, headlights blind sensors at night, vehicles move in every direction, and the incidents people care most about — break-ins, hit-and-runs, dumping, disputes over damage — are usually discovered hours or days after they happen. A camera layout that works on a storefront does not transfer to two hundred feet of open asphalt.

Abstract Enterprises Security Systems is a licensed NYS low-voltage contractor. We design parking lot camera systems from the ground up: entrance and exit coverage, license plate capture where the geometry supports it, pole and building mounting, concealed cabling by trench, conduit or wireless link, recording sized to how the lot is actually used, and remote viewing for owners and managers. Every proposal follows a free on-site survey — pricing and system design are determined by the site, not by a template.

This page walks through how lot systems are designed, the equipment classes involved, what drives cost, and what to check before hiring any installer — ours included.

System Design Starts With Lot Geometry

Before equipment is ever discussed, the layout question has to be answered: what are the sightlines? Every lot breaks down into a small set of zones — entrances and exits, drive aisles, parking rows, pedestrian paths, pay stations or kiosks, dumpster corners, and the perimeter. Each zone has a different camera job. An entrance camera is trying to read a vehicle; an aisle camera is trying to follow movement between rows; a perimeter camera is trying to see people crossing into the property at all.

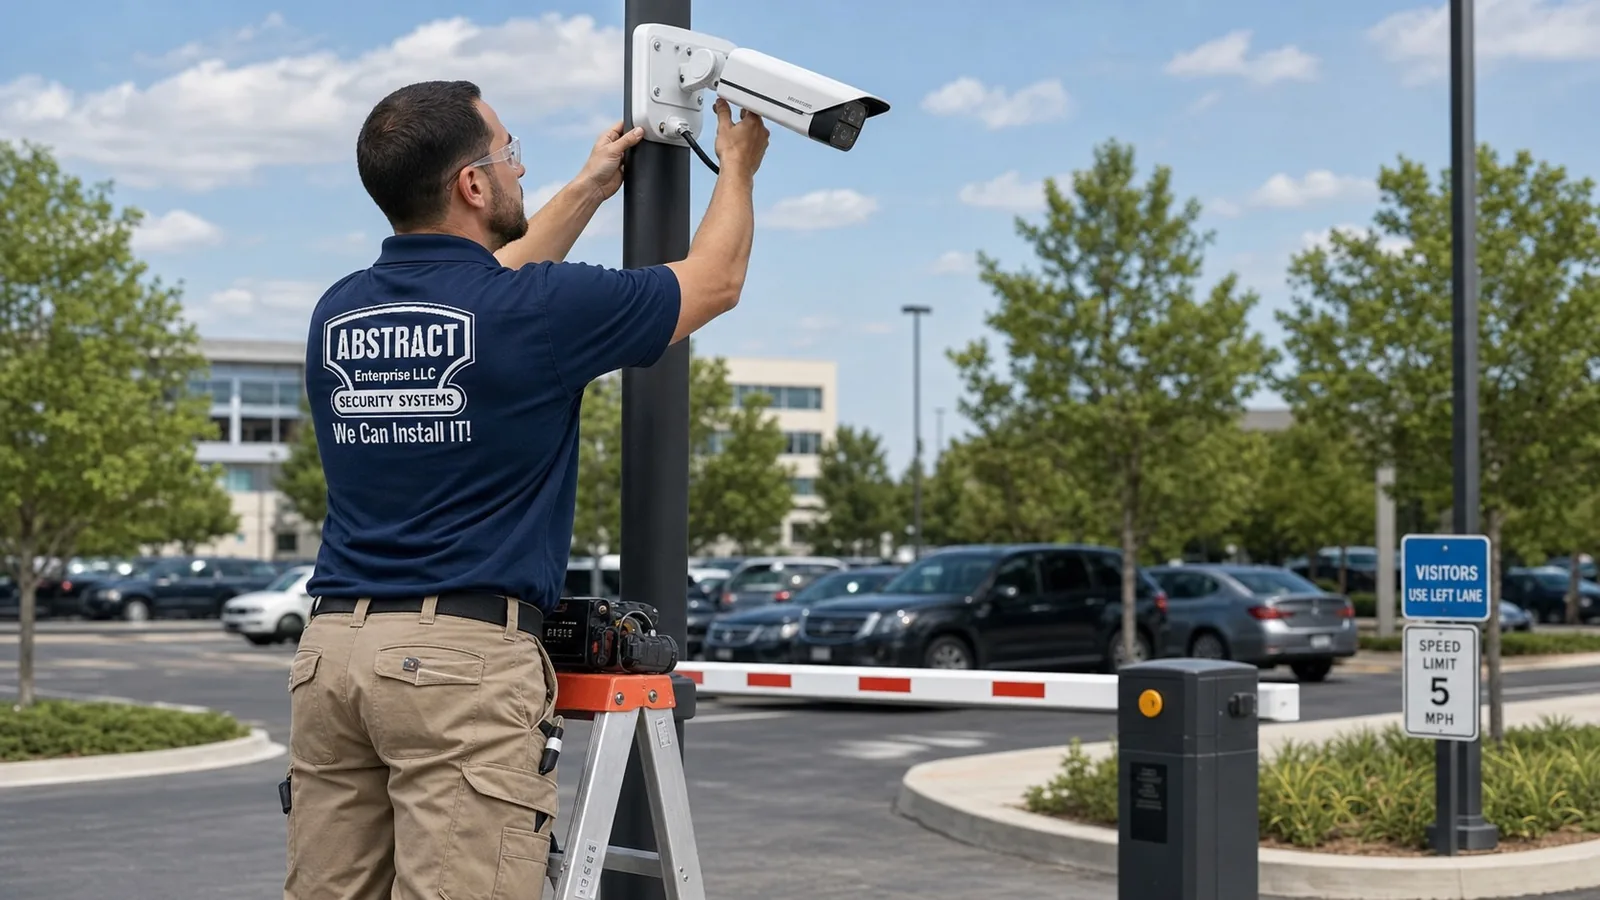
Technician on a step ladder mounting a fixed bullet camera to a pole beside a marked entrance lane, with visitor lane and speed limit signage in the parking lot behind
Parking lot security camera layout design in NYC: camera positions follow lot geometry — this one is aimed down a marked entry lane rather than across open rows.

Lot geometry decides camera count more than lot size does. A long narrow lot behind an apartment building can sometimes be covered with a handful of well-placed cameras on the rear wall. A wide square lot with landscaping islands, light poles and two curb cuts may need pole-mounted positions in the interior because no building-mounted view can see past the first two rows of vehicles. Vans, box trucks and SUVs create moving walls; a design that only works when the lot is empty is not a design.

The survey maps this on site: measured distances from each candidate mounting point to each zone, obstructions at vehicle height, lighting at night, and where power and network can realistically come from. The camera schedule falls out of that map — model, lens, height and aiming for each position, with a stated purpose per camera.

Entrances, Exits and LPR Placement

The entrance is the highest-value real estate in the whole system, because every vehicle that enters or leaves passes through a predictable lane at reduced speed. Lot designs commonly use two camera roles at each curb cut: a plate-focused camera zoomed tight into the lane where vehicles slow or stop, and a wider overview camera capturing the vehicle in context — make, color, condition, direction and occupants’ general description.

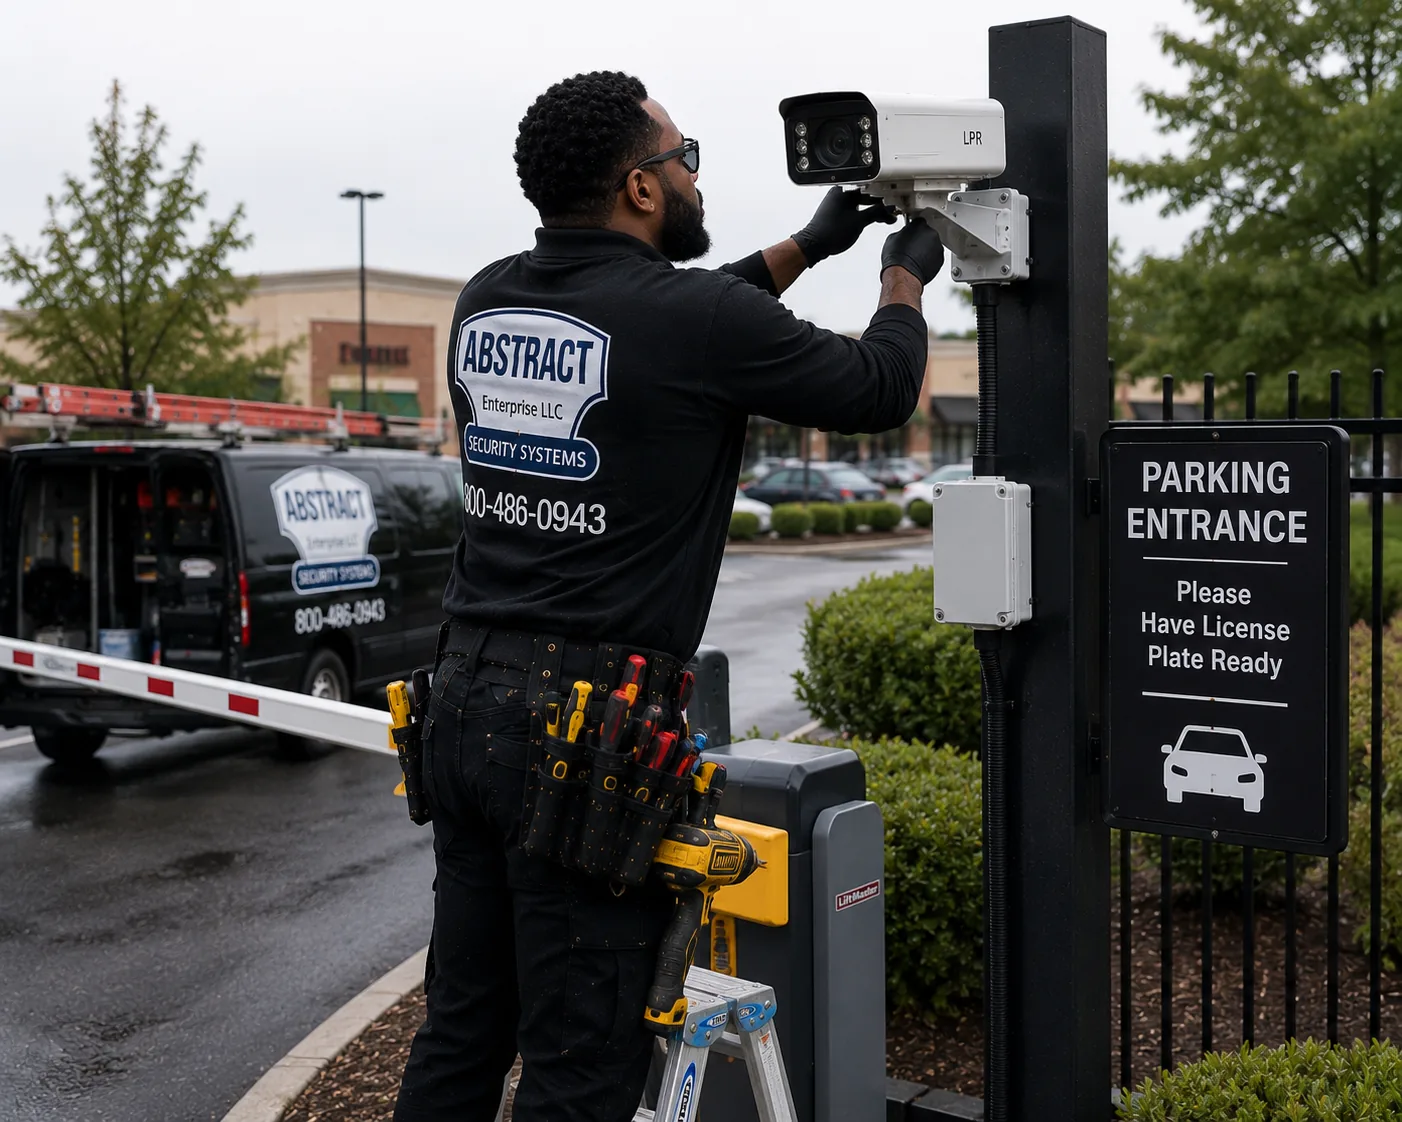
Technician adjusting a license plate recognition camera mounted on a black post at a gated parking entrance with a barrier arm and a plate-ready sign
Parking lot LPR license plate camera in NYC: the plate camera sits low and shallow to the lane at a controlled entrance, where vehicles slow at the barrier arm.

License plate reading (LPR) is a specialized job. Dedicated LPR cameras pair optics and processing tuned for plates: tight fields of view across a single lane, shutter speeds fast enough to freeze a moving plate, and IR tuned to the reflectivity of plate material at night. Placement is unforgiving — the camera wants a shallow horizontal angle to the lane, a mounting height low enough to keep the plate face readable, and a capture zone positioned where vehicles are slowest, such as the throat of the driveway or at a gate or speed bump.

Where geometry will not support reliable plate capture — wide uncontrolled entrances, steep approach angles, high-speed rolling exits — the honest design says so and leans on high-resolution overview coverage instead. Results vary according to camera placement, lighting, weather, lens selection, vehicle speed, plate condition, maintenance, recording configuration and site conditions. That sentence is not fine print; it is the physics of the job, and any installer who promises guaranteed plate capture on every vehicle in every condition is promising something cameras do not do.

Pole Mounting, Building Mounting and Heights

Open lots frequently need cameras where there is no building — which means poles. Pole work is its own discipline: footing and wind load appropriate to pole height, conduit stubbed up through the base, grounding and surge protection on every conductor that runs out into weather, and service loops so a camera can be re-aimed or replaced without re-pulling cable.

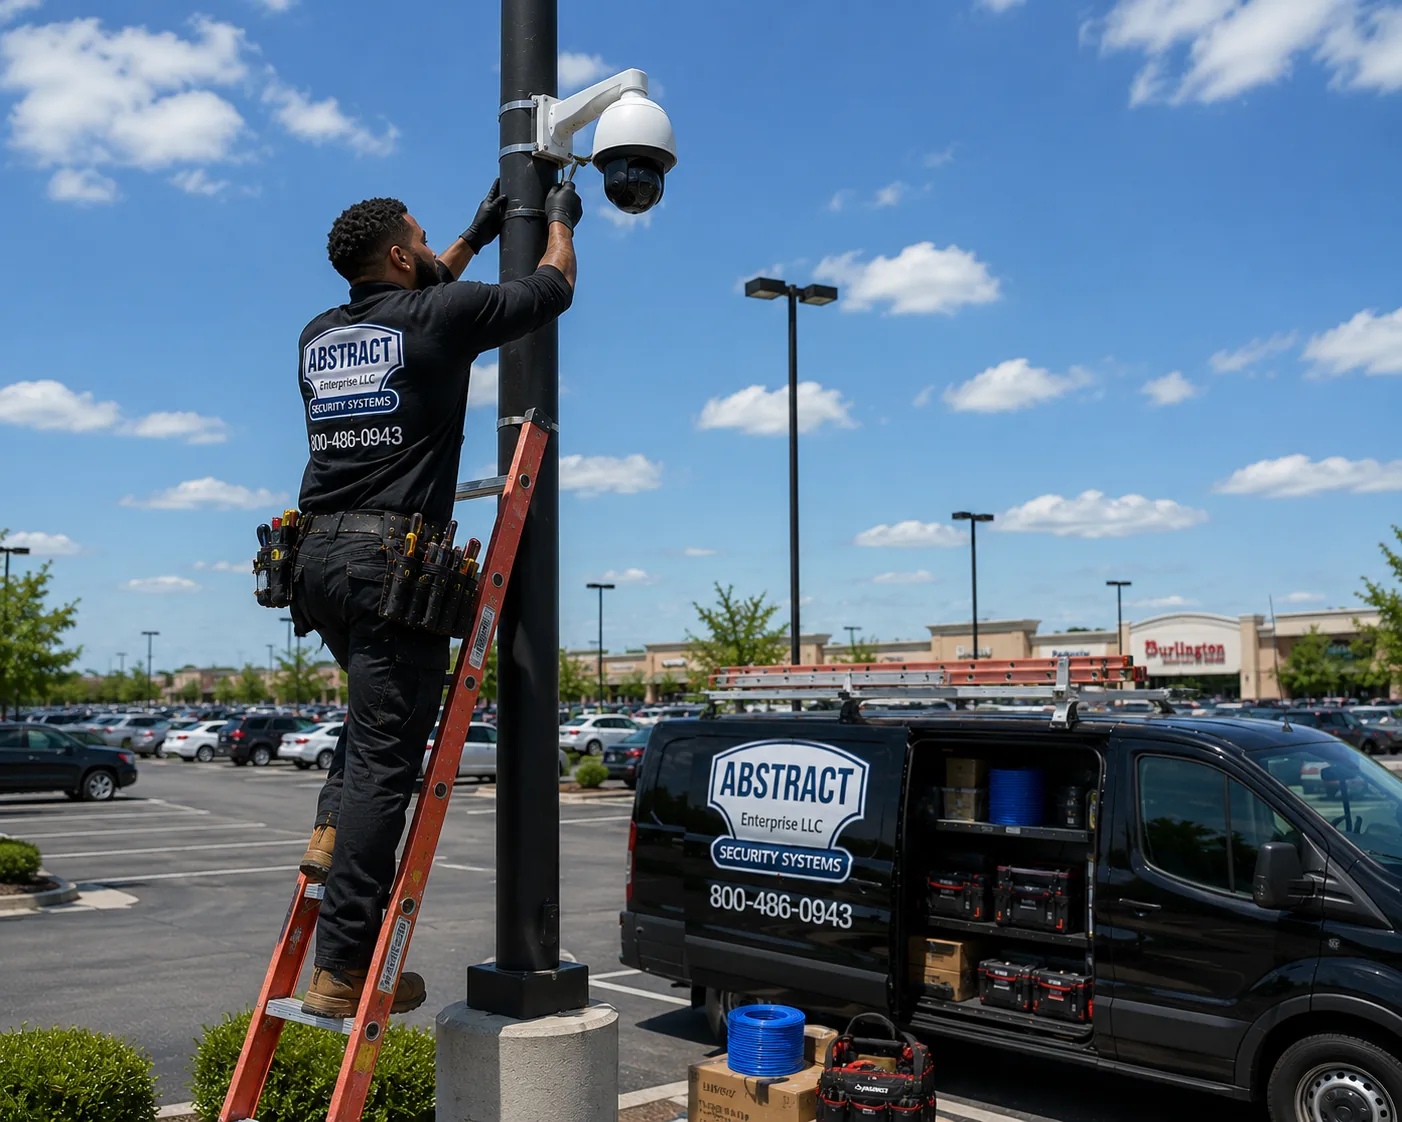
Technician on an extension ladder securing a white PTZ dome camera bracket to a parking lot light pole, service van parked alongside
Parking lot pole camera mounting in NYC: a PTZ position goes on the pole with the bracket squared and the cable dressed down the shaft before final aiming.

Height is a trade-off, not a bigger-is-better number. Higher mounting sees over parked vehicles and resists tampering, but flattens the view angle, which shrinks faces and plates. Lower mounting reads people and plates better but can be blocked by a single box truck and sits within reach. Typical lot designs mix heights by role: entrance plate cameras low in the lane, overview and aisle cameras at intermediate heights, and wide-area or PTZ positions higher on poles or parapets. Existing light poles are sometimes usable and sometimes not — pole ownership, available capacity, vibration and access all get verified during the survey rather than assumed.

Camera poles, electrical work, structural mounting, trenching, landmarked properties and work affecting a right-of-way may require owner, utility or AHJ review. AESS confirms applicable project requirements before installation.

Lighting and Nighttime Performance

Most parking lot incidents that end up mattering happen after dark, so night performance is a design input from the first site walk — ideally including a look at the lot at night. Lot lighting is rarely uniform: bright pools under fixtures, deep shadow between them, and headlight glare sweeping across everything. Sensors handle that badly unless the design accounts for it.

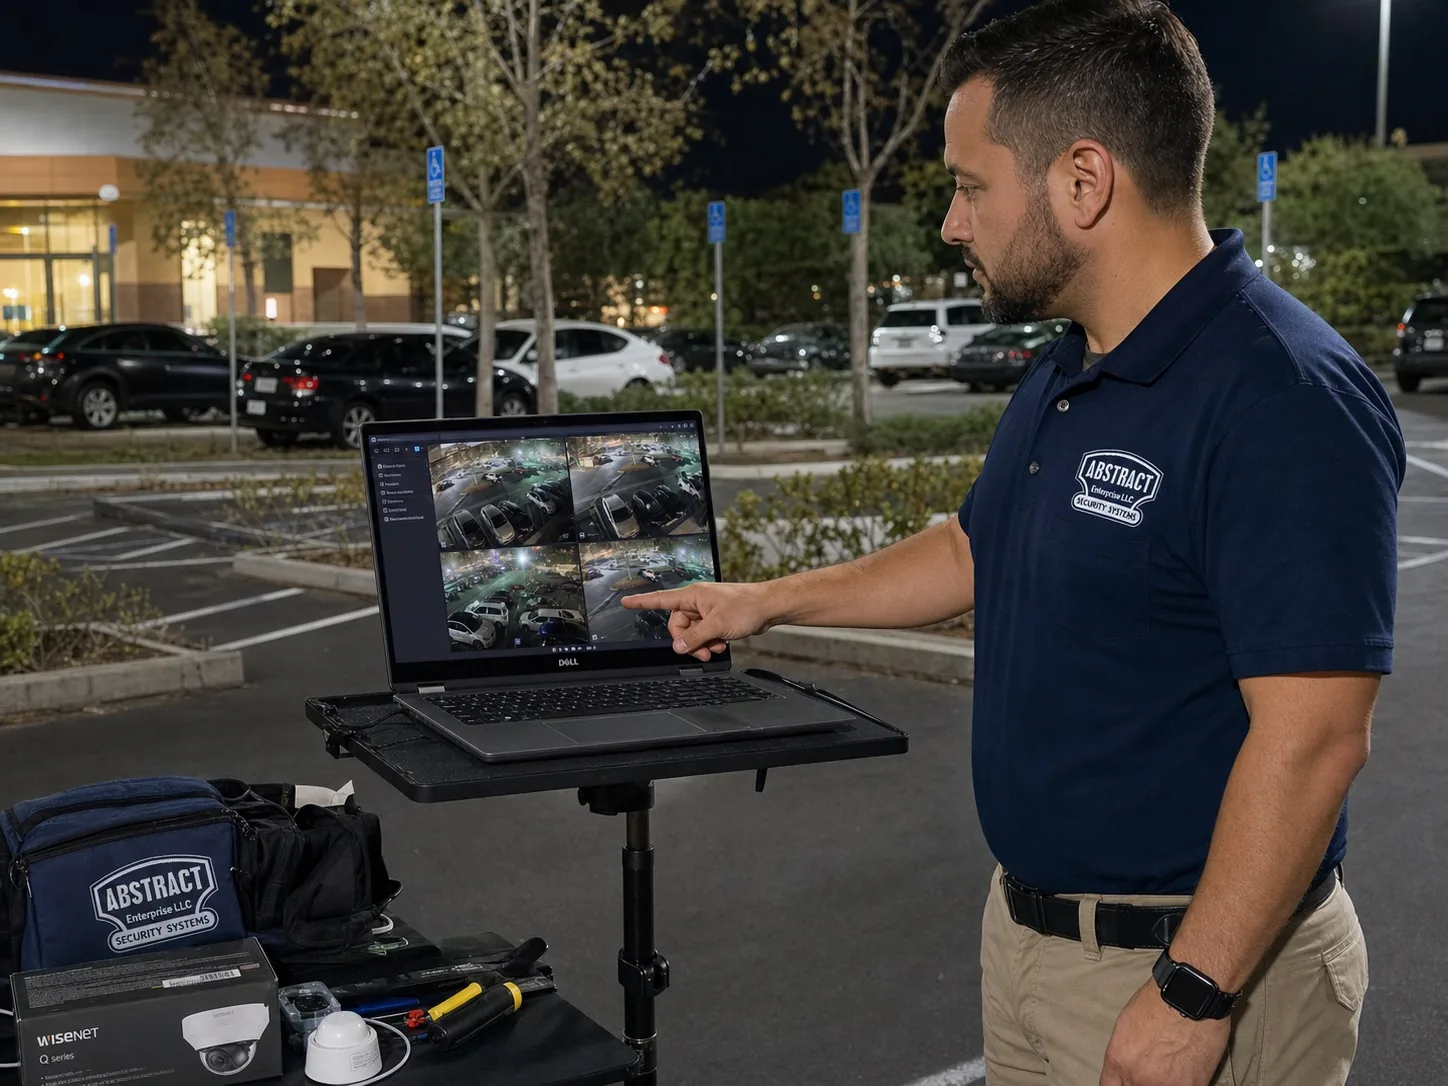
Technician reviewing a six-camera live view on a laptop mounted to a tripod stand in a parking lot after dark
Parking lot night surveillance camera work in NYC: night verification is its own step — every view gets checked for glare, dark gaps and usable detail under actual lot lighting.

The toolbox: larger-sensor cameras that gather more light, full-color low-light models where ambient lighting supports them, IR illumination where it does not, and wide dynamic range processing for scenes that mix bright entrances with dark rows. Aiming matters as much as hardware — cameras positioned so oncoming headlights strike the lens at a shallow angle wash out at exactly the moment a vehicle should be identified. Where lot lighting itself is inadequate, the honest recommendation is sometimes a lighting fix alongside the camera work rather than more expensive cameras compensating for darkness.

Camera Types Used in Lot Work: PTZ, Panoramic, Multisensor, Bullet, Turret

Fixed bullet

The workhorse for long, directional views — aisles, fence lines, entrance approaches. Visible housings state plainly that an area is covered, and integrated IR reaches usable distances. Varifocal lenses let each position be dialed to its exact field of view at aiming time instead of guessed at purchase time.

Turret

Compact ball-and-socket cameras that avoid the IR bounce-back domes suffer in weather, and re-aim quickly during commissioning. Common on building faces, garage ceilings and lower pole positions where a lower profile is preferred.

PTZ (pan-tilt-zoom)

Motorized cameras that patrol, follow, and zoom on demand — useful on large lots as a second layer over fixed coverage, or paired with monitoring so an operator can investigate what a fixed camera flags. A PTZ looking the wrong way records the wrong thing, so PTZs supplement fixed cameras rather than replace them.

Panoramic & multisensor

180°/360° and multi-imager units cover wide areas from a single mounting point — valuable on lots with few available poles. Each imager trades some pixel density at distance for breadth, so they pair with tighter fixed views at the spots where identification matters most.

Technician tightening a 4K bullet camera on a lot pole next to a private property video surveillance sign, with bullet and dome cameras on the equipment box below
Parking lot 4K bullet camera install in NYC: fixed bullet and dome housings cover different roles on the same lot, and posted signage goes up with the cameras.

Getting Signal and Power Across Asphalt: Cat6, Fiber, Trenching, Wireless

The invisible half of lot work is the pathway plan. IP cameras ride on cabling, and asphalt is in the way. Four methods carry most projects, chosen per run during the survey:

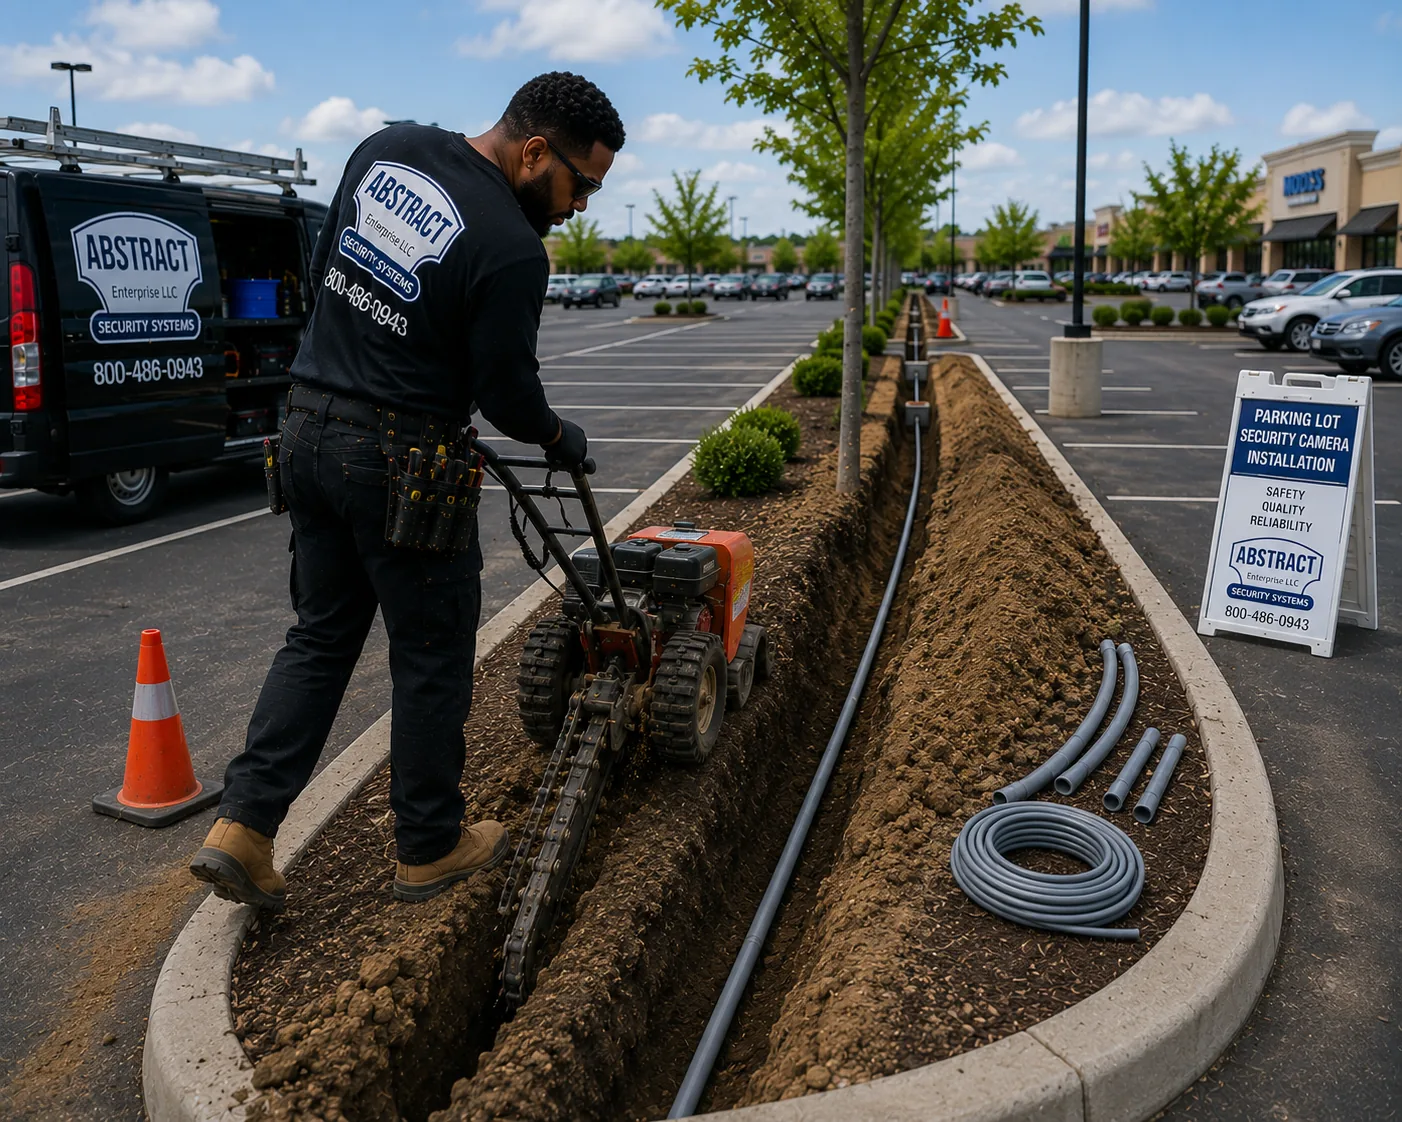
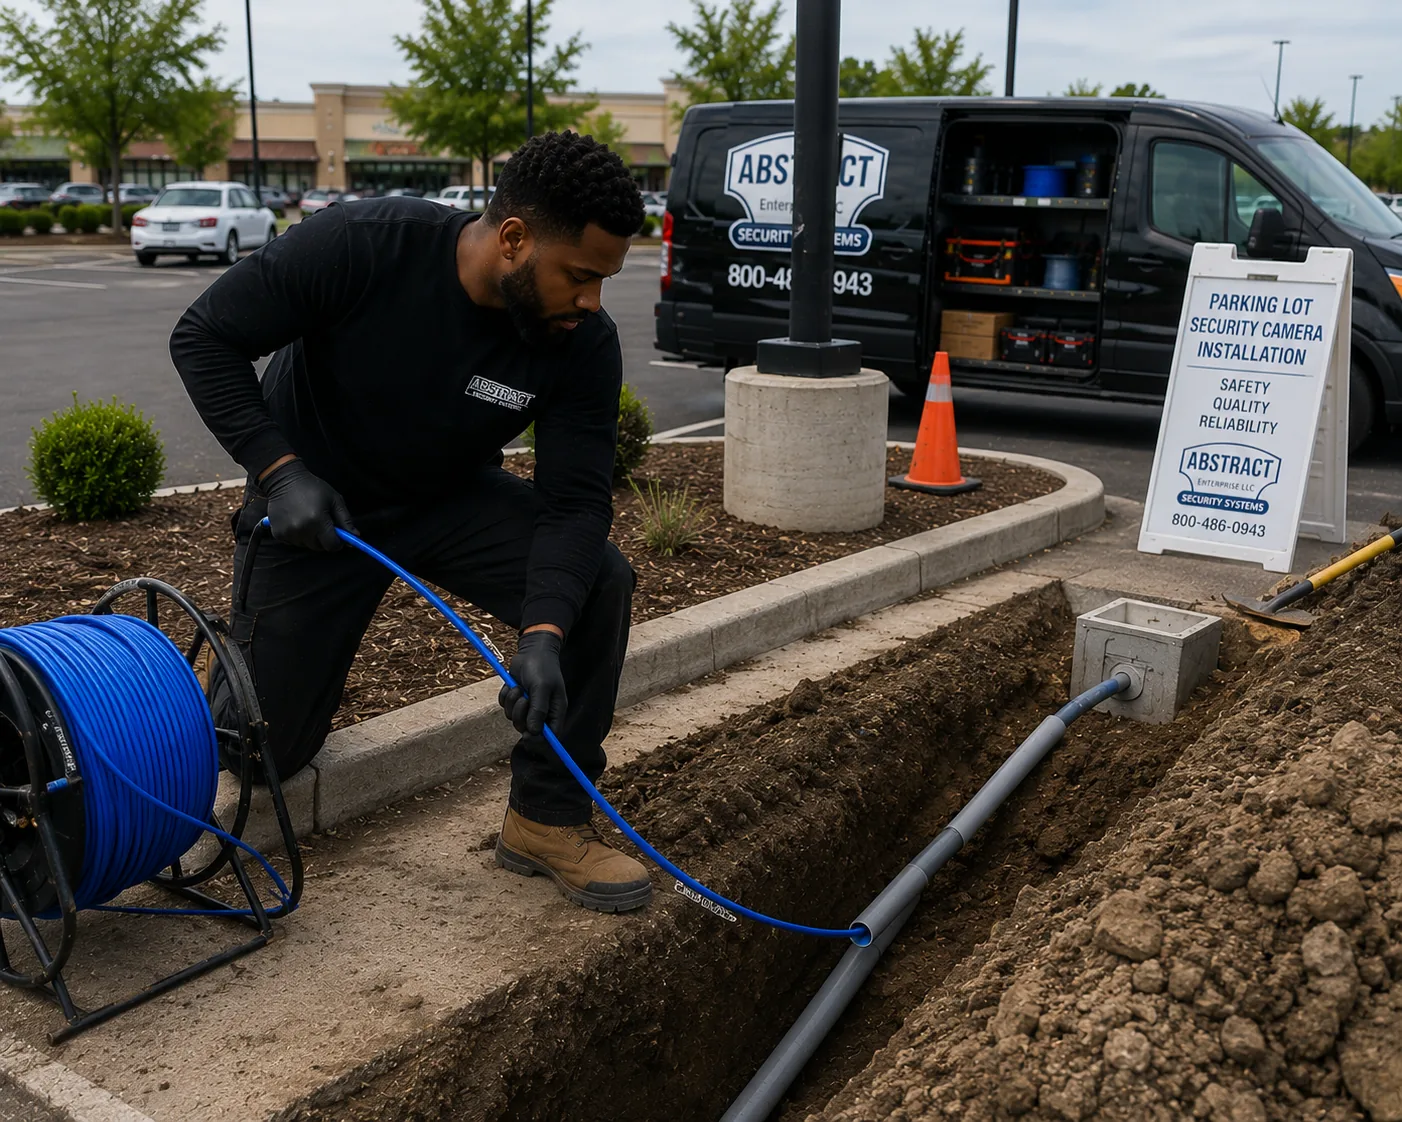
Technician operating a walk-behind trencher along a parking lot landscape island with conduit sections and a trench line running toward the lot
Parking lot camera trenching and conduit in NYC: pathways to interior pole positions get trenched and sleeved in conduit, with spare capacity pulled in for later additions.

Every outdoor run gets drip loops, weatherproof terminations, and surge protection at both ends; every pole run gets grounded. Lots eat sloppy cabling — sun, water, plows and vibration find every shortcut within a couple of seasons, which is why pathway workmanship gets specified in the proposal, not improvised on install day.

Analytics, Alerts, Monitoring and Escalation

Modern lot cameras can classify what they see — distinguishing people and vehicles from headlight sweep, rain and blowing debris — and trigger events on rules: a person crossing a perimeter line after hours, a vehicle lingering in a closed lot, motion at the dumpster corner at 3 AM. Used well, analytics turn a recording system into a notifying system. Used carelessly, they generate alert fatigue until everyone stops looking. Rule design is part of commissioning: which zones, which hours, which object types, and who gets told.

Escalation is the question analytics cannot answer alone: an alert at 3 AM only matters if someone acts on it. The options ladder up — push notifications to owners or managers, on-camera deterrents such as white-light strobes and audio talk-down triggered by events, and professional video monitoring services where trained operators review events live and follow an agreed escalation script. Which rung makes sense depends on the property, its incident history and its budget; the survey conversation covers all three honestly, including the option of starting with recording and adding monitoring later.

Recorded footage may assist with incident documentation. Coverage requirements, claim decisions and any possible policy impact must be confirmed directly with the property owner’s insurer.

NVR, Storage and How Retention Is Actually Calculated

Every camera decision lands on the recorder. Lot systems typically record to an NVR (network video recorder) sized for the camera count with room to grow, installed indoors in a secured, ventilated location — a locked office, IT closet or utility room — because a recorder mounted where an intruder can reach it is a system that can be carried off with the evidence inside.

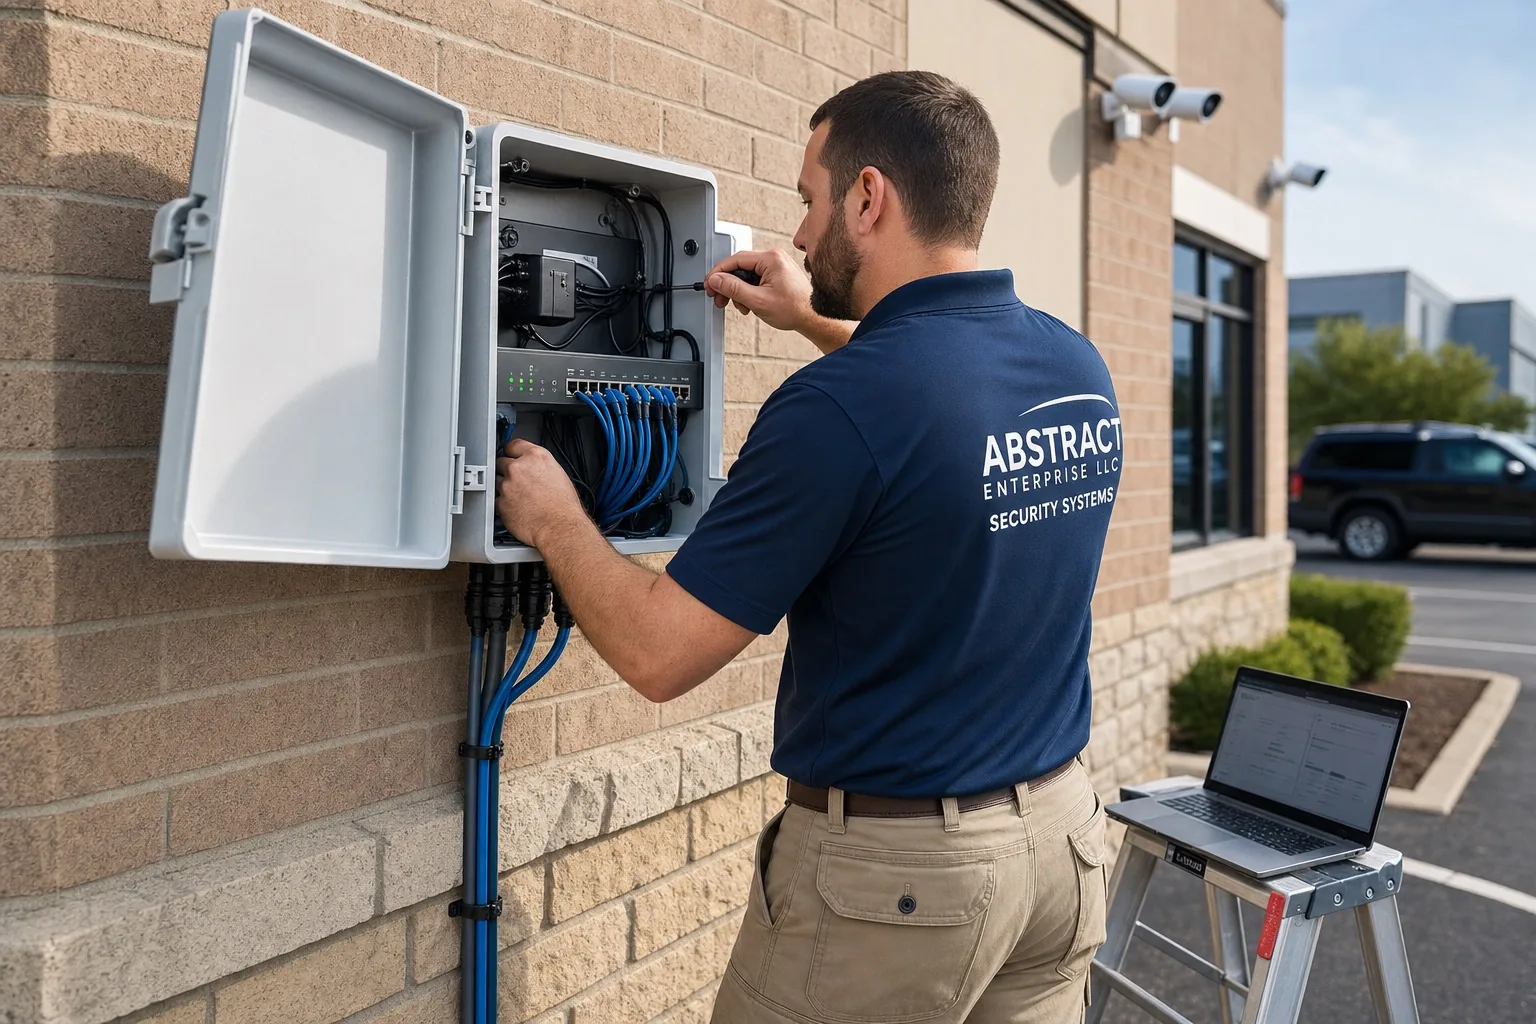
Technician wiring a PoE switch inside a weatherproof enclosure mounted on an exterior wall, with cameras above and a laptop staged nearby
Parking lot camera network enclosure in NYC: field switches live in sealed enclosures with cables entering through rated glands, feeding back to the recorder indoors.

Retention — how many days of footage the system holds before overwriting — is not a slogan number. It is arithmetic, calculated from camera resolution, frame rate, recording mode (continuous versus event-triggered), camera count, and installed storage capacity, then checked against two human factors: the incident-discovery window for that property, and the customer’s own requirements. A lot where damage is typically discovered the next morning has different needs than a monthly-parker garage where a tenant may return from three weeks of travel to find a dented quarter panel. We size storage to the realistic discovery window for the property, state the calculated retention in the proposal, and configure recording modes so the number holds in practice, not just on the spec sheet.

Remote viewing rounds out the head end: owner and manager access from phones and desktops, with individual user accounts rather than one shared admin login, so access can be granted and revoked person by person.

Garages and Lot Types: Each One Changes the Design

Parking garages

Concrete structures are a different job than open lots: low ceilings force wide short-range views, ramps and helixes create blind transitions, lighting swings hard between levels and daylight openings, and concrete complicates cable pathways and wireless. Designs lean on turret and panoramic cameras per bay section, ramp and stair coverage, and careful conduit planning.

Apartment & condo lots

Resident lots mix vehicles, pedestrians, children and move-in traffic. Coverage priorities: entrances, pedestrian paths between rows and building doors, and assigned-parking dispute zones. Boards and managers also weigh privacy expectations — aiming stays on the lot, not into windows.

Retail & shopping center lots

High turnover, cart corrals, delivery traffic and long open hours. Entrance capture and aisle coverage carry most of the load, with dumpster and rear-of-building positions covering the areas customers never see and incidents concentrate.

Dealership & inventory lots

Rows of identical high-value vehicles, after-hours risk, and demo traffic in and out all day. Designs emphasize perimeter and after-hours event coverage, entrance capture, and views tight enough to distinguish activity between rows.

Office & commercial lots

Predictable weekday rhythm with quiet nights and weekends. Schedules and analytics rules can be tuned tightly to the property’s hours, and coverage extends to walkways and building approaches employees actually use.

Houses of worship, schools & municipal lots

Sharp usage peaks, volunteer or staff oversight, and stakeholders who need simple viewing access. Designs favor straightforward layouts, clear signage, and coverage of entrances and gathering paths during peak flow.

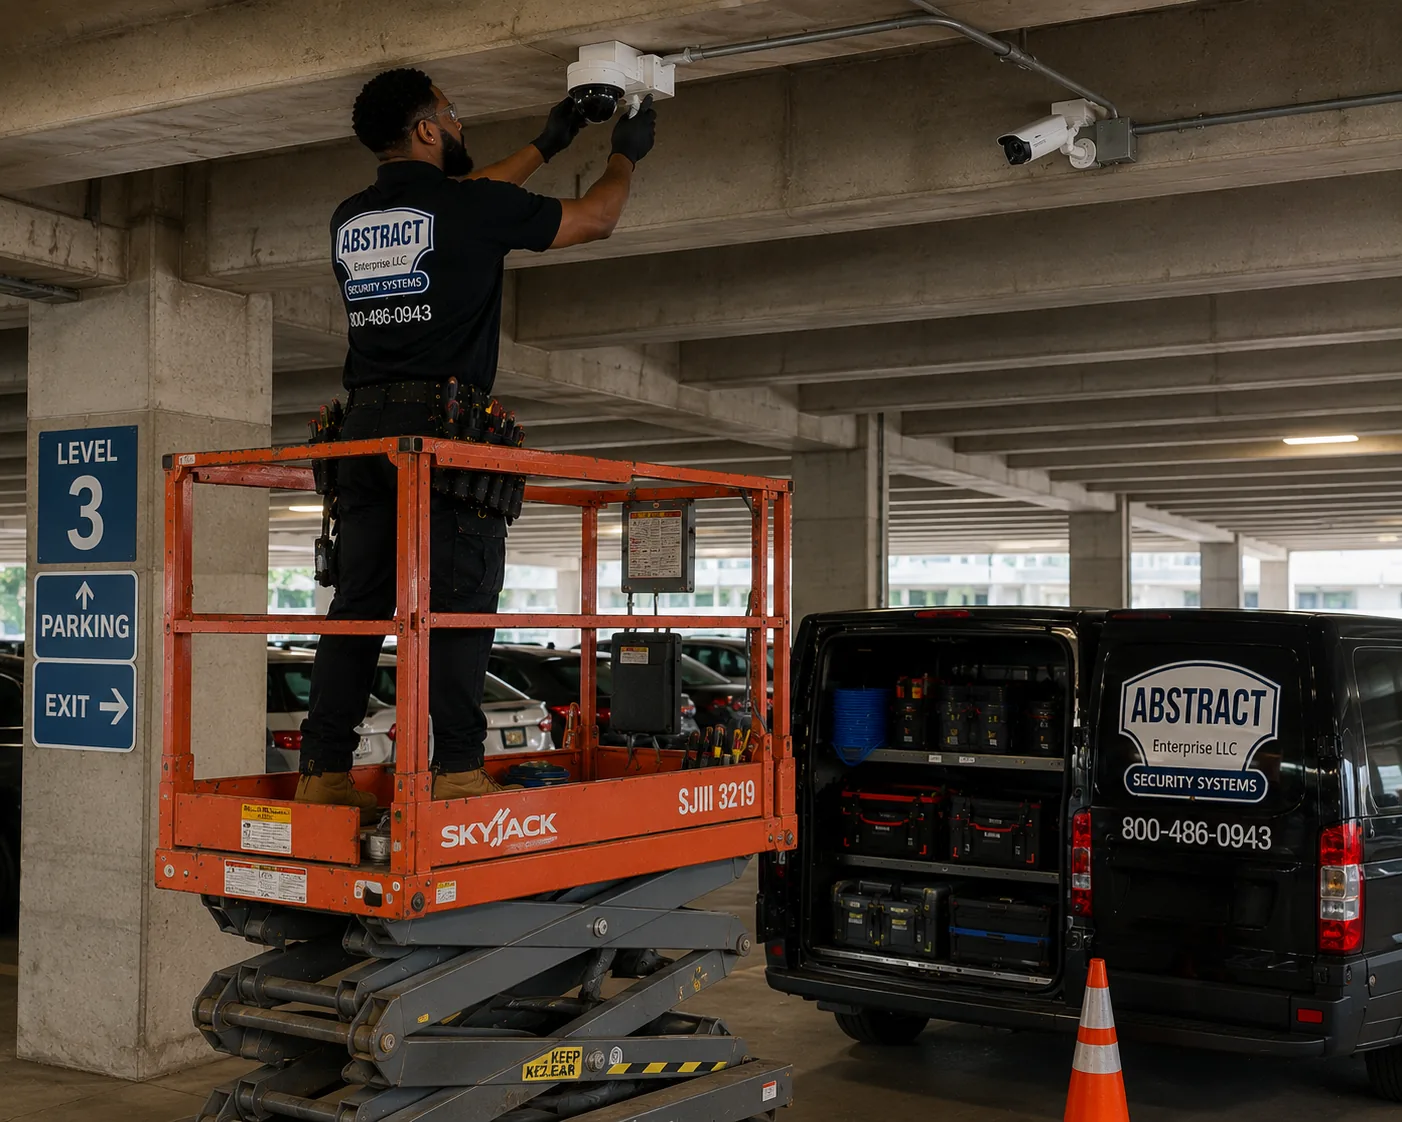
Technician on a scissor lift installing a dome camera on the concrete ceiling of a parking garage level, with a bullet camera and conduit run alongside
Parking garage camera installation in NYC: low ceilings and concrete change the approach — short-range domes per bay section, surface conduit, and lift access for every position.

Winter, Plow Season and Weather Realities

NYC lot systems live outdoors through freeze-thaw cycles, salt spray, nor’easters and plow season — and winter is precisely when visibility drops and incident review goes up. Weather-hardened design shows up in the details: IP-rated housings appropriate to exposure, heaters or defog where climate calls for it, mounting positions that keep lenses above plow spray lines and snow-pile sightline blocks, drip loops and sealed penetrations on every run, and surge protection on pole circuits that ride out electrical storms.

Plow season also moves the furniture: snow piles occupy corners of the lot for weeks, blocking views that were clear at the summer survey. Designs planned in warm months account for where snow gets pushed, and existing systems that lose coverage every January are strong candidates for a re-aim or a camera addition rather than living with a seasonal blind spot. Lens cleaning and re-aiming checks after major storms are part of honest system upkeep, and we say so up front rather than letting footage quietly degrade behind a film of salt.

Privacy, Signage and Where the Rules Sit

Camera systems on private lots operate inside expectations and rules that deserve straight treatment. Aiming discipline comes first: lot cameras belong on the lot — entrances, aisles, rows, perimeter — not angled into residential windows or areas where people reasonably expect privacy. Posted surveillance signage at entrances is standard practice on recorded properties and plainly tells drivers and pedestrians the lot is monitored. For properties with tenants, employees or association members, footage access is worth deciding in advance: who may view, who may export, and how requests are handled — individual user accounts on the recorder make those decisions enforceable instead of theoretical.

Camera poles, electrical work, structural mounting, trenching, landmarked properties and work affecting a right-of-way may require owner, utility or AHJ review. AESS confirms applicable project requirements before installation.

This content is general information and is not legal advice.

Surface Lots Versus Structured Garages: Two Different Projects

The single biggest fork in parking lot camera design is whether the vehicles sit under open sky or under concrete. Both are called "parking," and almost nothing about the engineering carries across.

A surface lot is an exposure problem. Cameras face weather every hour of their service life, distances run long enough that lens selection matters more than resolution, and the useful mounting points are scattered around the edges of the property or perched on light poles that were never installed with cameras in mind. Power is usually distant. Network is usually distant. The head end is inside a building that may sit at the far end of the property. Sightlines change as the lot fills, and the sun tracks across the scene twice a day, producing glare from opposite directions morning and evening. Every one of those factors is a design input, and every one of them costs something to solve.

A structured garage inverts the problem. Weather exposure drops sharply except at open decks, ramps and the entrance apron, so housing selection relaxes. Mounting points multiply — every ceiling bay, every column face, every beam is a candidate position. But distance collapses: ceilings sit low enough that a camera intended to cover a full bay section has to be wide, and wide at close range means detail falls off quickly at the far end of its own coverage zone. Concrete blocks wireless almost completely, so pathway planning is entirely conduit and cable. Lighting is artificial and continuous, but it is also uneven, with bright pools under fixtures and deep shadow under the vehicles themselves. Ramps and helixes create transitions where a camera looking down a straight aisle simply cannot follow a vehicle around the turn.

Camera counts also move in opposite directions from what people expect. A surface lot of a given square footage often needs fewer cameras than a garage of the same footprint, because open sightlines let one well-placed camera cover a long run. Garages need more positions because concrete divides the space into compartments, and each compartment needs its own eyes. Owners comparing a lot quote to a garage quote on a per-square-foot basis are comparing two unrelated numbers.

Mixed properties — a surface lot feeding a garage, or a garage with a rooftop deck — get designed as two systems sharing one recorder. The rooftop deck is a surface lot: weather-rated, glare-managed, wind-loaded. The levels below are a garage: short-throw, conduit-fed, artificially lit. Treating the whole property as one design produces the classic failure where the rooftop cameras are underspecified for weather and the interior cameras are aimed as though they had a hundred feet of sightline.

Entrance and Exit Geometry in Detail

Entrances concentrate value because they concentrate traffic through a narrow, predictable space at reduced speed. Getting the geometry right at a curb cut does more for a system than adding cameras anywhere else on the property. Getting it wrong produces the most common complaint in the industry: hours of recorded footage of vehicles nobody can identify.

The first question is the throat — the length of the driveway between the public sidewalk or roadway and the point where vehicles fan out into the lot. A long throat is a gift. It gives room to place a camera where the approach angle is shallow and the vehicle is still travelling in a straight line at low speed. A short throat, where cars turn directly off the street into the parking field, offers only a few feet of predictable travel, and the camera has to work at an angle that cuts across the vehicle rather than looking down its length.

Second is directional separation. A shared entrance and exit means one lane carries traffic in both directions, and a camera aimed at incoming plates sees only the rear of departing vehicles. Where entrance and exit are separated, each gets its own treatment: the entrance camera framed for the front of the vehicle and its occupants, the exit camera framed for the rear plate and departure direction. On a shared lane, either two cameras face opposite directions, or the design accepts that one direction is captured better than the other and documents which.

Third is the stopping point. Vehicles slow predictably at speed bumps, gate arms, ticket kiosks, stop bars and sharp turns. These are the highest-value capture zones on the property because a slower vehicle produces less motion blur, gives the sensor more time to expose correctly, and holds the plate in frame across more frames of video. When a design has the freedom to choose, the capture zone goes where the vehicle is already slowing rather than where the pole happens to be.

Fourth is what sits behind the camera. An entrance camera looking outward toward a bright street at midday is fighting a backlit scene; the same camera looking inward toward a shaded lot is fighting the reverse at sunset. Aiming decisions get made with the sun path in mind, and where both directions are compromised, the answer is often two cameras splitting the job rather than one camera trying to do both badly.

Fifth is the pedestrian opening. Almost every lot has a gap in the fence, a walkway from the sidewalk, or a stairwell door that people use and vehicles do not. These openings are frequently missed during design because the survey focuses on the vehicle entrance. They deserve their own coverage, framed at a height and angle appropriate for people rather than cars.

Pairing LPR With Overview Cameras

License plate recognition is a narrow instrument. An LPR camera is configured to do one thing extremely well — hold a legible plate image across a defined capture zone — and that configuration makes it poor at almost everything else. The exposure is biased for a retroreflective plate, which means the rest of the frame, including the driver, the vehicle body and the surroundings, often renders dark or washed out. The field of view is narrow enough that the vehicle around the plate may not fit. Shutter speed is fast enough to freeze motion, which further darkens everything that is not a plate.

That is why the standard approach at any serious entrance is a pair, not a single camera. The LPR camera reads the plate. A second overview camera, mounted nearby but configured completely differently, records the vehicle in context: body style, color, condition, damage, roof racks, decals, the number of occupants, which direction it turned. Neither camera can do the other's job, and either one alone leaves a gap that shows up precisely when the footage matters.

The two cameras also want different mounting treatment. The LPR camera wants to be low and shallow to the lane so the plate face stays square in frame. The overview camera wants to be higher and wider so it sees the whole vehicle and some of its surroundings without the plate camera's tight crop. Mounted on the same pole, they typically sit at different heights and aim at slightly different points along the lane — the plate camera at the stopping point, the overview camera a few feet earlier where the whole vehicle is visible.

Time synchronization ties the pair together. When both cameras record to the same recorder with a common clock source, a plate read and a vehicle image can be matched by timestamp during review. Without synchronized time, correlating two cameras' footage becomes a manual guessing exercise, which is why clock configuration is a commissioning step rather than an afterthought.

Results vary according to camera placement, lighting, weather, lens selection, vehicle speed, plate condition, maintenance, recording configuration and site conditions. A pairing improves the odds that useful information exists somewhere in the recording; it does not guarantee a readable plate on any given vehicle.

Speed, Headlight Glare and Plate Angle

Three physical variables govern whether a plate image is usable, and none of them are fixed by buying a more expensive camera.

Speed. A vehicle moving through a capture zone is a moving subject, and motion blur is a function of how far the plate travels while the shutter is open. Slower vehicles produce sharper plates, which is why capture zones are placed at natural slowing points. Where a vehicle passes quickly — a rolling exit onto a side street, a straight shot through an uncontrolled opening — shutter speed has to increase to compensate, which reduces the light reaching the sensor and pushes the design toward stronger IR illumination and tighter framing. Every one of those adjustments narrows the window in which the system works. A capture zone designed for slow traffic degrades when traffic moves fast through it, and the honest design accounts for how the lane is actually driven rather than how it is posted.

Headlight glare. At night, an oncoming vehicle presents two extremely bright sources a few feet from a comparatively dim plate. Sensors set to expose for the plate will bloom on the headlights; sensors set to handle the headlights will underexpose the plate. Wide dynamic range processing helps, but the more effective lever is geometry. A camera offset horizontally from the lane centerline, viewing the plate at a shallow angle rather than straight down the barrel of the headlights, sees far less direct glare. Height helps as well — a camera looking slightly down at the plate from above the headlight axis avoids the worst of the direct beam. These are placement decisions made at the survey, not settings adjusted later.

Plate angle. Plates are flat, retroreflective and legible from a limited cone. As the horizontal angle between the camera and the plate face increases, characters compress and the retroreflective return drops, so the plate stops looking bright to the camera's IR. As the vertical angle increases — a camera mounted high looking steeply down — the same compression happens in the other axis. Practical designs keep both angles modest, which is the real reason LPR cameras mount low and close to the lane rather than high on a pole where they would be safer from tampering. It is a genuine trade-off, and where tamper risk is severe the design may accept a higher mount and a reduced capture rate, documented as such.

Plate condition sits alongside these three: obscured, damaged, dirty, snow-covered, tinted-cover or temporary paper plates read poorly regardless of equipment quality. No configuration overcomes a plate the camera cannot see.

Mounting Height Versus Identification Detail

Height is the most misunderstood variable in lot design. The instinct is to mount high — higher cameras see more, resist tampering, and clear the tops of parked vehicles. All true. What gets lost is that every foot of additional height flattens the viewing angle, and a flattened angle turns faces into the tops of heads and plates into compressed slivers.

The way to think about it is pixel density on the subject rather than coverage area. A camera covering a wide area from high up spreads its available pixels thinly across that area; the same camera lower and tighter concentrates them. Identification — recognizing a specific person or reading specific characters — requires far more pixels on the subject than detection, which only requires knowing that something is there. A single camera cannot deliver both across a large lot, which is why lot systems mix roles rather than trying to make every camera do everything.

A practical hierarchy: cameras whose job is identification (entrances, doors, pay stations, pedestrian chokepoints) mount lower and frame tighter. Cameras whose job is following movement (aisles, rows, perimeter runs) mount at intermediate heights where they clear vehicle roofs but still see people at a usable angle. Cameras whose job is situational awareness (wide-area, PTZ, panoramic) mount high, and their footage is used to establish what happened and where, then to direct review toward the identification cameras that caught the detail.

Vehicle height sets the practical floor. A lot serving passenger cars has a different obstruction profile than one serving vans, box trucks or contractor vehicles. A camera mounted at a height that clears sedans will be blocked by the first cargo van that parks in front of it, and lots where tall vehicles are common need either more height or positions chosen so that no single parked vehicle can block the whole view.

Tamper resistance is real but frequently overweighted. Cameras within reach are vulnerable, but so is a camera at any height if its cable run is exposed at ground level. The more durable answer is a combination: identification cameras placed where they are hard to reach without a ladder, cable protected in conduit, vandal-rated housings where exposure is genuine, and coverage arranged so that cameras appear in each other's fields of view.

Light Poles: Ownership, Power and Coordination

Existing light poles look like free infrastructure. Sometimes they are. Often they are not, and the difference is established during the survey rather than discovered on install day.

Ownership is the first question. Poles on a private lot may belong to the property owner, to a landlord in a multi-tenant arrangement, to a leasing company under a lighting service agreement, or to the utility. Poles along the property edge may sit in the public right-of-way and belong to the city or the utility entirely. Attaching equipment to a pole you do not own requires permission from whoever does, and utility-owned poles in particular have attachment processes and standards that are outside a contractor's unilateral control. Camera poles, electrical work, structural mounting, trenching, landmarked properties and work affecting a right-of-way may require owner, utility or AHJ review. AESS confirms applicable project requirements before installation.

Power is the second question, and it is more subtle than "is there electricity in the pole." Lot lighting circuits are frequently switched — controlled by a photocell or timer so the circuit is energized only after dark. A camera fed from a switched lighting circuit goes dark every morning. Where a lighting circuit is the only feasible source, the design needs either an unswitched tap ahead of the control device or a separate circuit, and that is electrical work coordinated with a licensed electrician rather than improvised at the pole base.

Capacity and condition follow. An older pole may have limited space inside the shaft, corroded hand-hole hardware, a base that has been repaired, or a wiring compartment already crowded with lighting conductors. Structural capacity matters too: adding cameras, an enclosure and their wind load to a pole designed only for a luminaire changes the loading, and on tall or slender poles that is a question worth asking rather than assuming.

Vibration is the quiet killer. Poles sway in wind and shudder when trucks pass. A camera rigidly mounted to a swaying pole produces footage that drifts and shakes, and long-lens cameras magnify the movement. Positions near the top of a tall pole move more than positions lower down, which is another reason identification cameras favor lower mounting.

Where existing poles cannot serve — wrong location, wrong owner, no usable power, insufficient capacity — the design moves to dedicated camera poles, and the project picks up the cost and coordination that comes with them.

Dedicated Camera Poles and Structural Considerations

A dedicated camera pole is a small piece of civil construction sitting inside a low-voltage project, and it is the line item most often underestimated by owners comparing quotes.

The pole itself is chosen for height, material and loading. Height follows the coverage requirement, not preference. Material — steel, aluminum, composite — affects corrosion behavior, weight and cost, and coastal or heavily salted environments push the choice toward corrosion-resistant options. Loading combines the weight of the equipment with the wind load it presents, and cameras, enclosures and any accessories such as strobes or speakers all contribute.

The foundation follows from the pole. A concrete footing sized to the pole and soil conditions, with anchor bolts set to the pole's bolt circle and conduit stubbed up through the base for cable entry. Getting the conduit stub right at pour time is important: adding a pathway into a cured foundation later is far more disruptive than including it at the start, and spare conduit capacity poured in on day one is inexpensive insurance for future cameras.

Site conditions govern the rest. What is buried where the footing goes — utilities, irrigation, existing conduit, prior tenant infrastructure — is established through markouts before excavation. Where the footing lands relative to parking stalls, drive aisles and pedestrian paths affects both the excavation and whether protective bollards or a raised base are warranted in a location exposed to vehicle contact. Restoration of the surrounding surface is part of the scope.

Grounding is not optional on a dedicated pole. An outdoor metal structure carrying electrical and data conductors is an exposure path for surge, and a properly bonded grounding arrangement at the pole is the foundation that surge protection depends on. A surge protector installed without a solid ground reference is decorative.

Coordination is the practical constraint. Pole work involves excavation, concrete, electrical and low-voltage trades, sometimes a lift, and property access arrangements around active parking. Camera poles, electrical work, structural mounting, trenching, landmarked properties and work affecting a right-of-way may require owner, utility or AHJ review. Scheduling and completion time depend on site conditions, equipment availability, access, permitting requirements and project scope.

Underground Conduit, Saw-Cut Pathways and Restoration

Getting cable from a building to the middle of a parking field means crossing pavement, and how that crossing is made determines a meaningful share of the project cost and nearly all of its disruption.

Trenching through landscape islands and unpaved margins is the least invasive route when the geometry allows it. Many lots are laid out with planted islands running the length of the parking field, and a pathway that follows those islands can reach interior positions with minimal pavement work. Reinstating an island after trenching is straightforward compared with restoring asphalt.

Saw-cutting is the direct route across pavement. A cut is made, the pathway is placed, and the cut is patched. It is fast and predictable, but the patch is permanently visible and represents a seam in the surface that weather will work on over time. Cuts across drive aisles need patching to a standard that survives vehicle loading and freeze-thaw cycling rather than a cosmetic fill.

Directional boring passes beneath the surface without opening it, which preserves finished pavement and avoids traffic disruption across the crossing. It requires launch and receive pits at each end, adequate space to set up, and confidence about what is buried along the bore path. On lots where the surface is newly resurfaced or where cutting is prohibited by a landlord or association, boring is frequently the only acceptable answer.

Whichever method is used, conduit rather than direct burial is the durable approach: cable inside a conduit can be replaced, upgraded or added to without opening the ground again. Sizing the conduit generously and including a pull string for future runs costs very little at installation and saves an entire excavation later. Junction and pull boxes at intervals and at direction changes keep pulls within reasonable tension, and their covers get set flush and rated for whatever passes over them.

Restoration closes the work: backfill compacted to avoid settling, surfaces reinstated, striping repainted where cuts crossed marked stalls or aisles, and landscape areas made good. Trench length, surface type, restoration standard and the number of crossings are among the most significant variables separating one lot proposal from another, which is why they are itemized rather than absorbed into a lump sum.

Fiber, Cat6 and Point-to-Point Wireless

Every camera position needs a pathway back to the recorder, and lot geometry usually requires more than one method on the same property. The choice per run is an engineering decision, not a preference.

Cat6 with PoE is the default wherever the run fits inside Ethernet distance limits. One cable carries both data and power, terminations are quick, and troubleshooting is well understood. Outdoor and underground runs use cable rated for the environment — direct-burial or conduit-rated jackets, shielded where the run parallels power — and shielded systems require the shield to be bonded properly at one end to be worth using at all. The distance limit is real and not negotiable by using better cable: beyond it, the design switches methods or inserts a powered midpoint.

Fiber takes over on long runs, between buildings, and anywhere the pathway crosses ground with different electrical references. Because it carries no metal, fiber is immune to the surge coupling and ground-potential differences that make long outdoor copper runs risky, which is why building-to-pole-cluster backbones frequently run fiber even where copper would technically reach. Fiber carries no power, so a fiber-fed pole cluster needs local power — either a dedicated circuit at the pole or a power run alongside the fiber — and terminates into a media converter or switch inside a field enclosure. Choosing single-mode over multimode for outdoor backbones costs little extra and leaves headroom for distance and future bandwidth.

Point-to-point wireless bridges gaps where trenching is impractical, prohibited or disproportionately expensive: across a public right-of-way, over a newly paved surface, between separated parcels. Engineered links are not consumer Wi-Fi — they are directional radios aligned between two fixed points, specified for the distance, the required throughput, and a fade margin that keeps the link up in rain and snow. They require genuine line of sight, which means accounting for trees that will grow, vehicles that will park where a trailer once sat, and construction that may rise between the endpoints. Like fiber, wireless solves data and not power.

Where a position has no feasible power path at all, solar-plus-battery designs are the remaining option, sized to carry the load through consecutive low-sun days rather than to average conditions. For temporary coverage during construction, events or seasonal operations, temporary solar surveillance trailers provide self-contained camera positions without any permanent infrastructure. Where a lot project extends into broader network and pathway work across a property, it overlaps directly with parking lot structured cabling and fiber installation, and planning both together avoids duplicating trenches and conduit runs.

Surge Protection and Grounding for Outdoor Equipment

Outdoor camera systems fail from electrical events more often than from any other single cause, and the failures cluster after storms. A camera on a pole in an open lot is an elevated device connected to long conductors, which is close to a textbook description of something that will collect induced surge.

Two distinct problems are at work. The first is direct and nearby lightning activity, which induces high-voltage transients on any long conductor in the vicinity — no direct strike required. The second is ground-potential difference: when two ends of a copper run sit on different electrical references, current flows through the data cable's shield or conductors, which quietly degrades equipment over months rather than destroying it in a moment.

The defenses are layered. Bonding and grounding come first, because every other protective device references ground; a surge protector connected to a poor ground has nowhere to send energy. Poles and metallic enclosures get bonded, and the grounding arrangement is coordinated with the building's electrical system rather than treated as an isolated afterthought.

Surge protection devices then go at both ends of every outdoor run — at the camera or field enclosure and again where the run enters the building, before it reaches the switch or recorder. Protecting only the camera end leaves the expensive head-end equipment exposed to whatever the run collects. Both power and data conductors need protection; a protected data line feeding a device whose power line is unprotected is only half a solution.

Fiber removes the problem entirely for the runs it serves, which is a design argument for fiber beyond distance alone. Where a lot has a history of storm-related equipment loss, converting the longest copper backbone runs to fiber often does more for reliability than replacing cameras.

Maintenance closes the loop. Surge protection devices are sacrificial by design — they absorb energy and degrade. Devices with status indication get checked periodically, and after a significant electrical event the protection itself is inspected rather than assumed intact. A system that survived a storm because its protectors did their job is a system whose protectors may now be spent.

Outdoor Enclosures and Field PoE Switches

On any lot beyond a handful of cameras, the design stops running every cable back to the building and starts aggregating in the field. A weatherproof enclosure at a pole cluster holds a switch, power supply, surge protection and terminations, and a single backbone run — fiber or copper — carries everything back to the head end. This reduces trenching dramatically, and trenching is the expensive part.

Enclosure selection follows the environment. Outdoor enclosures are rated for the conditions they face: wind-driven rain, dust, ice, and washdown where applicable. Ratings are only meaningful if the installation preserves them — cable entries through properly rated glands or hubs rather than drilled holes, gaskets intact, doors closing and latching squarely, and penetrations placed on the bottom rather than the top so water is not invited in by gravity.

Thermal management is the detail most often skipped. A sealed metal box in direct summer sun is an oven, and the electronics inside have upper operating limits. Mitigations include mounting on shaded faces, sun shields, vented or louvered designs with filters, and in extreme cases active cooling. In cold conditions the reverse applies, and equipment with a low-temperature rating or an enclosure heater keeps a switch from failing to start on a January morning.

Power budget matters at the field switch. PoE switches have a total power budget shared across ports, and cameras with heaters, IR illuminators, PTZ motors or integrated strobes draw substantially more than a basic fixed camera. A switch sized only to the number of cameras rather than to their combined draw works fine in mild weather and then drops cameras on the first cold night when every heater energizes at once. Sizing includes headroom for the actual load plus room to add.

Physical security applies to the enclosure as much as to the cameras: locking hardware, mounting above easy reach where practical, and a camera positioned to observe the enclosure. Labeling inside the door — what each port feeds, what the backbone is, where the power originates — turns a future service call from an investigation into a task.

Garage Concrete, Ramps and Wireless Obstruction

Parking structures impose constraints that shape every part of the design, and the constraints come from the material itself.

Reinforced concrete blocks radio effectively. Wireless links inside a garage rarely work between levels or through structural walls, and mesh approaches that look attractive on paper fail in practice against rebar. Garage designs are cabled designs, and the cabling is surface-mounted in conduit because concrete does not accept fished cable. That means pathways are visible, which makes their layout an aesthetic decision as well as a technical one — runs that follow beam lines and existing conduit look intentional, runs that cut diagonally across a ceiling do not.

Anchoring into concrete is its own discipline. Fasteners are selected for the substrate, and locating existing reinforcement before drilling matters both for structural reasons and to avoid a fastener that will not hold. Post-tensioned decks require particular care, and any structural mounting on a parking structure may require owner or AHJ review before work proceeds.

Ramps and helixes are the geometric problem. Vehicles change elevation and direction simultaneously, so a camera covering a straight run loses the vehicle at the transition. Coverage strategy places cameras at the top and bottom of each ramp facing the transition rather than trying to follow the curve, so a vehicle is documented entering and exiting rather than tracked continuously. Curved helixes may need positions on the curve itself, aimed across the arc.

Lighting inside a garage is artificial, continuous and uneven. Fixtures create bright pools with dark gaps between them, and vehicles cast deep shadows underneath. The transition zones at deck openings and entrances are the hardest scenes on the property, mixing full daylight with interior shade in a single frame; those positions need wide dynamic range and careful aiming, and are the ones most likely to disappoint if specified casually.

Ceiling height sets lens choice. Low ceilings force wide fields of view to cover a bay section, and wide fields at low mounting height mean detail concentrates near the camera and falls off with distance. Practical garage designs accept shorter coverage zones and more positions rather than stretching a single camera across a whole level.

Night Aiming and Lighting Coordination

A camera system aimed only in daylight is a system aimed for the conditions under which the fewest incidents occur. Night verification is a separate step, and on lot projects it is the step that separates a system that works from one that merely records.

What changes after dark: lot lighting creates hot spots and dark gaps that are invisible at noon; headlights sweep across scenes at exactly the moments vehicles are entering or leaving; IR illumination reflects off nearby surfaces, signage, and even the camera's own mounting hardware, washing out the frame from within; and infrared can bounce back from wet pavement in ways that produce a completely different image than dry conditions.

The verification pass walks each camera at night and checks what is actually usable, not simply whether an image appears. Are faces recognizable at the distance the camera is supposed to cover them? Does the entrance camera still work when a vehicle's headlights are pointed at it? Are there dark zones between light fixtures where a person would be a silhouette? Is IR bouncing off a wall, a pole or a nearby sign back into the lens? Does the image quality hold when the pavement is wet?

Fixes are usually adjustments rather than replacements: re-aiming a few degrees to move a bright source out of frame, changing IR intensity or switching to external illumination positioned away from the camera, adjusting exposure and dynamic range settings for the actual scene, or repositioning a camera a few feet to change its relationship to a light fixture.

Sometimes the correct recommendation is lighting rather than cameras. A lot with genuinely inadequate illumination will produce marginal footage from any camera, and improving the lighting frequently costs less than the camera upgrades needed to compensate for the dark. Lighting improvements also affect the property in ways cameras cannot — people behave differently in a well-lit lot. Where lighting work is recommended, it is coordinated so that new fixtures do not end up aimed directly into a camera that was positioned before the lighting changed.

Snow, Salt, Plows and Seasonal Sightlines

A lot camera system is a four-season installation reviewed most heavily in the season that degrades it most. Winter planning is a design activity, not a maintenance afterthought.

Snow piles are the biggest seasonal change to a lot's geometry. Plowing consolidates snow into corners, along islands and at the ends of rows, and those piles can stand for weeks. A camera positioned in July with a clear view down an aisle may spend January looking at a wall of snow. Designs made in warm months ask where snow gets pushed — the property manager always knows — and place cameras and choose heights accordingly.

Plow spray and equipment contact are physical risks. Plows throw slush, salt and gravel at height, and reversing equipment contacts anything close to the pavement. Low-mounted cameras and enclosures near drive lanes are exposed, and bollards, curbs or repositioning protect them. Cable runs at ground level near plow paths need protection they would not need on an interior wall.

Salt is a slow attacker. Salt spray accelerates corrosion on mounts, fasteners, enclosure hardware and cable jacket entries, and it builds a film on lenses and domes that scatters light — degrading night footage first, while day footage still looks acceptable. This is the mechanism by which a system that was excellent in year one becomes mediocre by year three without anyone noticing a specific failure.

Ice and temperature affect the equipment itself. Cameras with heaters and defoggers keep domes and windows clear; cameras without them can ice over and stay blind through a cold snap. Housing heaters increase power draw, which loops back to PoE budget sizing. Battery-backed devices lose capacity in cold, so backup runtime calculated at room temperature overstates winter performance.

Practical seasonal upkeep: clean lenses and domes before winter and again in spring, verify aiming after major storms, check for snow-pile obstructions that have appeared since the last review, inspect surge protection after electrical storms, and confirm that heated cameras are actually cycling. A short seasonal pass keeps a system honest; skipping it is how footage quality erodes without a single alarm being raised.

Repair, Takeovers and Modernization of Existing Lot Systems

Plenty of lot work is not a blank slate — it is an existing system that has stopped earning its keep: cameras dark on the wall, a recorder nobody has the password to, analog resolution that cannot read a plate across the drive aisle, or coverage designed for a lot layout that changed two re-stripings ago. We take over, repair and modernize existing parking lot systems regardless of who installed them.

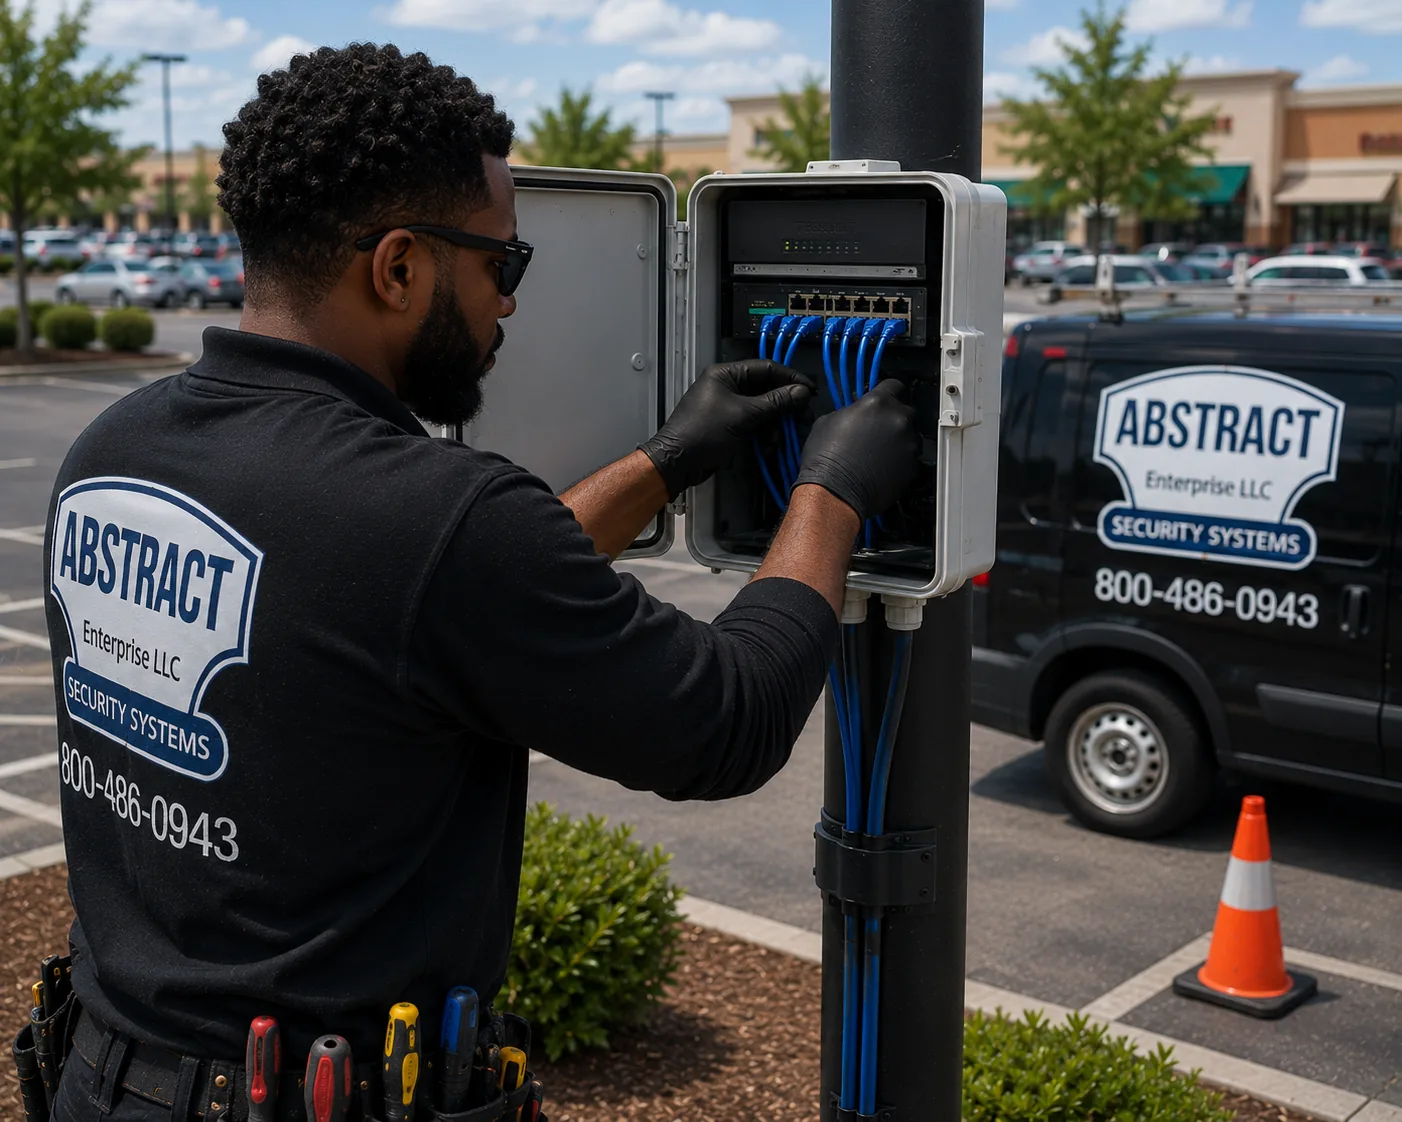
Technician servicing patch cables in an open pole-mounted equipment enclosure containing a network switch in a parking lot
Parking lot camera repair and service in NYC: existing systems get diagnosed at the enclosure first — switch, terminations and cable condition before any camera is replaced.

The path starts with an assessment: which cameras and runs are healthy, which recorder and cabling can be reused, and where the real gaps are. Hybrid recorders can keep serviceable existing cameras running while new IP cameras come online, so a modernization can proceed in phases instead of a rip-and-replace. Common repair calls on lot systems include failed pole cameras, water-damaged terminations, storm and surge casualties, cut or degraded runs, recorder faults and lost remote access — each diagnosed on site rather than guessed at over the phone.

Scheduling and completion time depend on site conditions, equipment availability, access, permitting requirements and project scope.

Dumpsters, Loading Zones and Rear-Building Coverage

The areas customers never see are where lot problems concentrate, and they are the areas most often left out of a coverage plan because nobody thinks to walk them during a daytime survey.

The dumpster corner is a category of its own. It attracts illegal dumping from outside the property, it is where staff go alone at odd hours, it offers concealment behind the enclosure itself, and it is frequently the darkest corner of the lot because lighting was designed around parking stalls rather than service areas. Coverage aimed at a dumpster area works best framed to include the approach — the drive path a vehicle uses to back in — rather than only the container, because a plate on the approach is worth more than a wide shot of someone unloading.

Loading zones and service doors carry deliveries, contractors, and property access that never passes the main entrance. A camera covering a loading zone documents who arrived, what was moved, and in which direction, and it covers a door that is frequently propped open during deliveries. Where a service door is also an employee entrance, the same position serves double duty.

Rear-of-building runs are the classic gap. The front of a property gets attention because that is what the owner sees; the rear gets a single wide camera or nothing. Rear areas typically have utility equipment, condenser units, meters, service panels and the least foot traffic, which is exactly the combination that attracts problems. Coverage here does not need to be dense, but it needs to exist and it needs enough detail to be useful rather than a wide shot that establishes only that something happened.

Corners where the property line meets an adjacent parcel deserve a look as well. Access from a neighboring lot, a gap in a fence, or a shared drive means people can enter without passing any of the designed entrances. These crossings get identified by walking the perimeter, and they are the reason a perimeter walk is part of every survey rather than an optional extra.

Pedestrian Walkways and Employee Safety Routes

Cameras aimed only at vehicles miss half of what happens on a lot. People walk from their cars to a building, from a building to a bus stop, across drive aisles at unmarked points, and out to a lot alone at closing time. Those paths are where personal safety concerns concentrate, and they are framed differently than vehicle coverage.

Pedestrian coverage wants lower mounting and tighter framing than aisle coverage, because the goal is recognizing a person rather than tracking movement. A camera positioned along a walkway at a height where faces stay in the usable part of the frame is worth more than a high wide-angle position that captures the same walkway as a set of moving shapes.

The employee route is worth mapping explicitly during the survey. Which door do staff leave from at closing? Where do they park? Do they cross an unlit section of the lot, pass a blind corner, or walk behind the building to reach their vehicles? Coverage that follows that route end to end — door, path, parking area — addresses a concern that owners hear about from staff long before it shows up in an incident report.

Crosswalks and drive-aisle crossings serve a documentation purpose as well. Where pedestrians and vehicles share space, footage of an incident establishes sequence and position in a way that recollection cannot. Recorded footage may assist with incident documentation. Coverage requirements, claim decisions and any possible policy impact must be confirmed directly with the property owner's insurer.

Accessible parking areas and the routes from them deserve specific attention: they sit closest to entrances, are used by people who may move slowly, and are frequently the location of disputes about misuse. A camera covering accessible stalls and the path from them serves both safety and enforcement purposes without any additional equipment class.

Documenting a Break-In or Hit-and-Run: The Review Workflow

A camera system earns its keep during review, and review is a skill as much as a feature. Most owners discover the workflow for the first time under pressure, which is the worst moment to learn it. Walking through it in advance is part of a proper handover.

Establish the window. The reporting party knows when they parked and when they returned. That bracket, not a guess, defines the search. Wider brackets mean more footage to review, which is why encouraging people to report promptly and precisely is worth doing.

Start at the vehicle, not the entrance. Find the affected vehicle in the aisle or row coverage and scrub for the moment of the event. Working outward from the event is faster than working forward from the entrance, because the entrance carries every vehicle that arrived while the aisle carries only the relevant one.

Fix the time, then move to other cameras. Once the moment is identified on one camera, that timestamp becomes the index into every other camera on the system. This is where synchronized time matters: if cameras drift apart, the timestamp on one no longer points to the same moment on another, and correlation becomes manual.

Follow the subject backward and forward. With the moment fixed, review earlier footage to establish arrival — which entrance, which vehicle, which direction — and later footage to establish departure. This is where the entrance pairing pays off, because the arrival and departure passes are the two moments most likely to produce a plate and a clear vehicle image.

Export before anything overwrites. Retention is finite, and the clock is running from the moment of the incident. Export the relevant segments from every camera that contributed, not just the single best angle, and export them promptly rather than after a police report is filed days later.

Results vary according to camera placement, lighting, weather, lens selection, vehicle speed, plate condition, maintenance, recording configuration and site conditions. A well-designed system improves the chance that useful footage exists; it does not guarantee identification, and no camera system dispatches police or produces any particular investigative outcome.

Evidence Export and System Time Synchronization

Two technical details determine whether footage is useful outside the property: how it leaves the system, and whether its timestamps mean anything.

Time synchronization comes first because everything else depends on it. Recorders and cameras drift — internal clocks lose or gain time steadily — and a system left alone for a year can be minutes off. When a recorder is synchronized to a reliable time source and cameras take their time from the recorder, timestamps across the system agree with each other and with the outside world. When it is not, correlating cameras becomes guesswork and any timestamp offered externally invites doubt. Daylight-saving transitions and time zone configuration are part of the same setting; a system configured to the wrong zone is off by hours in a way that is easy to miss and awkward to explain later.

Export format matters next. Systems typically offer a proprietary export that preserves original data and requires the manufacturer's player, and a common video format that plays anywhere but has been re-encoded. Both have a place: the standard format for sharing quickly and viewing without special software, the native format when the original data matters. Exporting both for anything significant costs nothing and covers either need. Where a system produces a checksum or verification file with a native export, that file gets kept with the footage rather than discarded.

What accompanies the export is often overlooked. A useful package includes the footage, a note of which camera each clip came from, the camera's location and view, the time window covered, and the date the export was made. That context is trivial to record at export time and difficult to reconstruct weeks later.

Export capability is also a permissions question. Whether a manager can export independently or must call the owner is a decision made at setup, and it is worth deciding deliberately rather than discovering during an incident that the only person with export rights is unreachable.

Practical constraint: export takes time proportional to the footage length and the number of cameras. A request to "pull everything from the weekend" across a dozen cameras is a large operation. Narrowing the window before exporting saves hours.

User Permissions and Footage-Access Procedures

The most common access failure on a lot system is not a technical one. It is a single administrator account shared by an owner, a manager, a maintenance lead and whoever else has needed it over the years — which means access cannot be revoked when someone leaves, and there is no record of who viewed or exported anything.

Individual accounts fix this. Each person who needs access gets their own credentials at a permission level matched to their role: full administrative rights limited to one or two people, live-view and playback rights for managers, live-view only where that is sufficient, and export rights granted deliberately rather than by default. When someone leaves, their account is disabled without disrupting anyone else.

Permissions can also be scoped by camera. On a multi-use property, a tenant representative might reasonably view the cameras covering their own area without seeing coverage of the entire property. On a residential property, that scoping matters more, and the arrangement is worth settling with the board or owner before access is granted rather than after a request creates friction.

A written access procedure prevents most disputes. It answers: who may view live, who may review recorded footage, who may export, how a resident, tenant or employee requests footage of an incident involving them, who decides, and what happens with requests from outside parties. Deciding these questions in advance means the first request is handled by policy rather than improvisation.

Remote access hygiene belongs here too: unique strong passwords rather than defaults, credentials not shared over text or email in plain form, access removed promptly on staff changes, and a periodic review of who still has an account. On systems configured for remote viewing, the account list is the security perimeter.

Camera placement, signage and footage handling on private property intersect with rules that vary by property type and circumstance. This content is general information and is not legal advice.

Recorder Health Monitoring and Maintenance Planning

The quiet failure mode in surveillance is a system that appears to be working and is not recording. Live views look fine, the recorder's lights are on, and nobody discovers the gap until footage is needed. Health monitoring exists to close that gap.

Storage is the usual culprit. Drives in a recorder run continuously and wear out, and a failing drive can degrade for weeks before it fails outright. Recorders report drive status, and configuring the system to notify on drive errors, capacity anomalies and array degradation converts a silent failure into an email. Where a system uses redundancy, a failed drive still needs replacing promptly — redundancy buys time, not immunity.

Camera dropout is the second category. Cameras go offline from cable damage, water intrusion at a termination, PoE budget exhaustion, switch failure or physical damage, and on a large lot a single dark camera is easy to overlook in a multi-view display. Recorders can report a camera that stops responding; enabling that notification is a two-minute configuration step that prevents months of unnoticed loss.

Recording verification is the check that matters most and is performed least. Once a quarter, someone pulls up footage from a random camera at a random time several days back and confirms it exists and is usable. That single test catches misconfigured schedules, motion rules that stopped triggering, storage that is filling faster than expected, and cameras that record black at night. It takes minutes and it is the only test that verifies the actual purpose of the system.

A practical maintenance rhythm for a lot system: monthly, glance at the camera list for anything offline and confirm remote access still works; quarterly, run the playback verification, check drive health reports, and review retention against what the system was designed to hold; twice a year, clean lenses and domes and verify aiming; annually, review coverage against how the property is now used, inspect outdoor terminations and enclosures, confirm surge protection status, and update firmware where appropriate.

Retention drift is worth watching specifically. Adding cameras, raising resolution or switching from event to continuous recording all consume storage faster, and a system that held its designed retention at commissioning may hold noticeably less two changes later. Checking actual retention rather than assuming it is part of the annual review.

Modernizing Analog Parking Lot Systems

A great deal of installed lot surveillance is analog, and analog systems on lots age badly in a specific way: they were adequate when installed for establishing that an event occurred, and they were never capable of the identification detail owners now expect. Coax runs are frequently intact and reusable; the cameras and recorder are the limitation.

The reusable asset is the cabling. A lot with coax already trenched to pole positions has the expensive part of the infrastructure in place, and that changes the economics of an upgrade substantially. Several paths exist depending on what the property needs.

HD-over-coax replaces cameras and recorder while keeping existing coax, delivering a substantial resolution improvement without opening the ground. It is the least disruptive route and it works well on lots where the camera positions themselves are still correct and the only problem is image quality. Its ceiling is lower than full IP, and it does not bring the analytics, flexible resolution options or network features that IP cameras offer.

Hybrid recorders accept both analog and IP inputs, which allows a phased migration. Existing analog cameras keep running on day one while new IP cameras are added where they matter most — typically the entrance and any position needing plate capture — and the analog positions get converted over time as budget allows. For properties that cannot fund a full replacement at once, this is usually the sensible path.

Ethernet over existing coax uses adapters to carry IP camera traffic on installed coaxial cable, allowing full IP cameras without new trenching. It adds equipment at both ends of each run and imposes bandwidth limits that vary with cable length and condition, so it suits some runs better than others.

Full IP replacement pulls new cable and starts fresh. It is the most expensive and most capable, and it makes the most sense when the existing camera positions are wrong anyway — a lot that has been restriped, expanded or repurposed since the original system went in often needs a new layout regardless of technology.

The assessment that precedes any of these tests the existing cabling rather than trusting it. Coax that has been in the ground for fifteen years may be perfect or may be water-damaged at a splice nobody documented, and finding out during commissioning is worse than finding out during assessment.

Replacing Cameras Versus Replacing the System

When a lot system underperforms, the question is which layer is actually failing. Replacing cameras on a sound system is a modest project; replacing a system because a few cameras disappointed is an expensive way to solve the wrong problem.

Camera-level replacement is the right answer when the recorder is healthy and has capacity, the cabling and pathways are sound, the camera positions are correct, and the complaint is image quality at specific locations — a dark entrance, an aisle where faces are unusable, a position that cannot hold detail at its distance. Swapping those cameras for better-suited models addresses the complaint directly, and modern cameras frequently work with an existing recorder if the recorder supports the resolution and the protocols involved.

System-level replacement becomes the right answer when the recorder is at or beyond capacity for the resolution the property now needs, when storage cannot be expanded to reach the required retention, when the platform no longer receives firmware support, when remote access has become unreliable or insecure, or when the recorder itself has failed. It is also the answer when the fundamental design is wrong — too few positions, cameras aimed at the wrong zones, a layout built for a property that has since changed shape.

Positions deserve separate examination from equipment. A lot that has been resurfaced and restriped, added a building, changed its entrance, or converted a section to loading has a coverage map that no longer matches the property. Better cameras in the wrong positions produce sharper images of the wrong things. Assessment looks at layout before it looks at model numbers.

Phasing is usually available and usually worth discussing. Addressing the entrance first, then aisle coverage, then perimeter, spreads cost across budget cycles while putting the highest-value coverage in place first. A phased plan documented at the assessment also prevents the second phase from being designed as though the first had never happened.

Scheduling and completion time depend on site conditions, equipment availability, access, permitting requirements and project scope.

Multi-Tenant Lots: Who Is Responsible for What

Shared parking creates questions that are organizational rather than technical, and they are far easier to settle before equipment is installed than after.

Ownership of the equipment comes first. In a multi-tenant property the landlord typically owns lot infrastructure, but arrangements vary: a tenant may fund cameras covering their own frontage, an association may own common-area systems, and a single anchor tenant may operate coverage of an area they effectively control. Whoever owns the equipment owns its maintenance, its failures and its replacement, and that is worth stating in writing rather than assuming.

Access to footage follows ownership but is not identical to it. A tenant whose customer's vehicle was damaged will ask for footage, and the answer should be a known procedure rather than a negotiation. Common arrangements include the property manager as the single point of review, scoped tenant accounts limited to cameras covering their own area, or a request process with a defined response path. Any of these work; having none of them is what causes friction.

Coverage responsibility divides the property. Common areas — drive aisles, entrances, shared walkways — are usually landlord scope. Areas under a tenant's exclusive control — a dedicated loading dock, a fenced service yard, a tenant's own entry — may be theirs. Mapping this explicitly during design prevents the situation where an area everyone assumed was covered turns out to belong to nobody.

Cost allocation in a shared property often runs through common-area maintenance arrangements, and how a camera project is treated — capital improvement, operating expense, or a tenant-specific charge — is a question for the property's own agreements. It affects approval timelines significantly, which is why it comes up early rather than at signature.

Privacy expectations rise with the number of parties. Cameras on shared property should cover the property, and aiming that captures a tenant's interior through glass, or a neighboring parcel, creates problems that are easily avoided at aiming time. Signage at entrances is standard practice on monitored property. This content is general information and is not legal advice.

Property-Manager Handoff Documentation

A system is only as good as the next person's ability to operate it. Property management turns over, boards change, and the person who watched the installation is frequently not the person who needs footage two years later. Documentation is what survives that turnover.

A complete handoff package includes:

Documentation delivered as files rather than a binder in one person's office survives staff changes. Recorder-side labeling reinforces it: channels named by location rather than left as defaults, so someone opening the system for the first time can find the entrance camera without a map.

Designing for Future Access Control and Gates

Lots frequently move toward controlled access after cameras are installed — a gate arm, credentialed entry for tenants, an intercom at the entrance, or automated visitor management. Designing for that possibility during the camera project costs very little; retrofitting it afterward frequently means opening the same ground twice.

The provisions worth making at camera time:

None of these commit the property to installing access control. They preserve the option cheaply. If gating is on the horizon at all — even as a board discussion or a budget line for a future year — saying so at the survey is the highest-value information an owner can provide.

Parking Lot Camera Maintenance Checklist

A lot system degrades gradually and silently. This checklist is written to be handed to a property manager or maintenance lead and worked through on a schedule.

Monthly

Quarterly

Seasonally

Annually

Questions for Property Managers Before a Site Survey

The survey is faster and the resulting design is better when the property manager arrives with these answers. None require technical knowledge — they are all operational facts only the property knows.

A property manager who brings this list to the walk turns a survey into a design session, and the proposal that follows reflects the property rather than a template.

Closeout Testing and Customer Training

The last day on site determines whether the system is usable by the people who own it. Commissioning is a defined set of checks, and training is a defined handover, not a five-minute demonstration on the way out.

Commissioning checks cover each camera individually: field of view matches the design intent for that position; focus and zoom are set for the target zone rather than left at defaults; the image performs acceptably at night as well as in daylight; recording is confirmed on that channel by playing back a segment rather than assuming; motion or analytics rules trigger where intended and do not flood on headlights or weather; time is synchronized and correct including time zone; and any tamper or offline notification is verified by actually triggering it.

System-level checks follow: retention verified against the design calculation with the actual configuration running; storage health confirmed; remote access tested on both a phone and a desktop from outside the property network; user accounts created at their intended permission levels and each one tested; export tested end to end, producing a file that plays on an ordinary computer; and cable labeling and enclosure documentation completed.

Training is hands-on with the people who will use the system, not with whoever happens to be available. It covers finding a camera's live view, searching playback by date and time, exporting a clip, adding and removing a user, what the maintenance schedule requires, and what to do when something looks wrong. The most valuable part is having each person perform each task themselves once while someone is standing there, because the gap between watching and doing is where most support calls originate.

Training ends with the documentation package handed over and a walkthrough of the camera map so the operator understands not just how to use the system but what each camera was designed to accomplish. A manager who knows that camera 4 exists to capture plates at the north entrance searches differently than one who sees twelve unlabeled channels.

Planning for Expansion

Lot systems grow. Properties add buildings, reconfigure parking, absorb an adjacent parcel, or simply identify a spot that needed a camera once an incident occurred there. Whether growth is straightforward or painful is determined by decisions made during the original installation.

The provisions that make expansion cheap:

Phased projects benefit most. A property funding cameras across several budget cycles should install the full pathway infrastructure in the first phase, when the ground is already open, and add cameras to it later. The trench is the expensive part, and digging it twice is the most avoidable cost in lot surveillance.

Expansion is also a design review, not just an equipment addition. Adding cameras to a layout that has drifted out of alignment with the property compounds the original problem. A short reassessment before an expansion — what has changed, where problems now occur, whether existing positions still serve — keeps the system matched to the property it protects.

Service Standards

Rather than testimonials, here is what every parking lot project gets, stated as commitments you can hold us to:

Licensed NYS contractor

Abstract Enterprises Security Systems holds NYS Low-Voltage License #12000287431. Licensing, insurance documentation and references are available on request before any work begins.

Survey before pricing

Every proposal follows a free on-site survey. Camera positions, pathways and equipment are specified from the actual site — we do not quote lot systems from a phone call.

Itemized proposals

Proposals list each camera position with its purpose, the pathway plan, recorder and storage sizing with calculated retention, and scope boundaries in writing — so comparisons with other bids are apples to apples.

Workmanship standards

Weatherproof terminations, drip loops, surge protection and grounding on outdoor runs; secured recorder placement; labeled cabling; individual user accounts instead of shared logins.

Walkthrough & documentation

Commissioning ends with a walkthrough of live views, playback, export and mobile access, plus documentation of logins, camera maps and settings handed to the owner — it is your system, not ours.

Three-year warranty

Products supplied by AESS carry a three-year warranty for normal wear and tear — full terms below and at our warranty page.

★ 4.7 · 201 Google Reviews across our service work citywide.

Questions to Ask Any Parking Lot Camera Installer

Whoever you hire — us included — these questions separate lot-ready installers from generalists. Bring them to every walkthrough:

What Actually Drives Parking Lot Camera Pricing

Lot projects vary too widely for honest flat pricing — two lots with the same square footage can be very different projects. Pricing is determined after a free on-site survey, and the proposal itemizes exactly where the money goes. These are the variables that move the number:

Coverage & equipment

  • Camera count and camera classes (fixed, LPR, PTZ, panoramic)
  • Number of LPR lanes and entrance configurations
  • Recording retention target and storage sizing
  • Monitoring, deterrence and alerting scope

Site conditions & labor

  • Pole quantity, height and footing requirements
  • Existing power and existing conduit that can be reused
  • Trenching distance and surface restoration
  • Fiber or wireless link requirements between zones
  • Lift requirements for high positions
  • Property access and working-hours constraints
  • Permit or AHJ review where applicable
Technician pulling blue network cable from a spool into gray conduit laid in an open trench beside a parking lot island
Parking lot camera cable pull in NYC: trench length, conduit runs and pull labor are among the biggest variables separating one lot quote from another.

A survey visit answers all of these for your specific lot, and the itemized proposal that follows shows each driver priced on its own line. Scheduling and completion time depend on site conditions, equipment availability, access, permitting requirements and project scope.

The Site Survey: What Happens Before Anything Gets Installed

The survey is the whole project in miniature. A technician walks the lot with you, and the visit produces the information every later decision depends on. What gets covered:

  1. Purpose conversation — what prompted the project, what incidents the property has actually seen, and who will use the footage.
  2. Zone mapping — entrances, exits, aisles, rows, pedestrian paths, kiosks, dumpster and rear areas, perimeter lines.
  3. Sightline check at vehicle height — what a box truck or full row of SUVs blocks from each candidate mounting point.
  4. Mounting inventory — usable building faces and parapets, existing poles and their ownership, and where new poles would need footings.
  5. Lighting assessment — fixture placement, dark gaps, glare paths, and whether a night visit is warranted before finalizing lens and camera selection.
  6. Power and pathway audit — available circuits, existing conduit, trenching routes, wireless line-of-sight, and where a head-end enclosure can live.
  7. Head-end location — a secured, ventilated indoor spot for the recorder, with network access and a plan for who holds physical keys.
  8. Retention math — discovery window discussion, then storage sizing calculated against camera count, resolution, frame rate and recording mode.
  9. Constraints review — access hours, tenant or customer traffic, landlord or association approvals, and any owner, utility or AHJ review the scope may require.
  10. Written proposal — per-camera plan, pathway plan, equipment schedule, retention calculation, and itemized pricing.

Fourteen Things Worth Deciding Before Your Lot Project Starts

Owners and managers who work through this list before the survey get a sharper proposal and fewer changes mid-project:

  1. Define the primary job. Deterrence, incident documentation, plate records, dispute resolution or access enforcement — the priority order changes the design.
  2. Write down the actual incident history. What happened, where in the lot, and at what hours. Real history beats general anxiety for aiming decisions.
  3. Decide who will watch and who will review. Owner only, on-site manager, board members, security staff, or a monitoring service.
  4. Set a realistic discovery window. Overnight, a few days, or weeks — this drives storage sizing more than any other single input.
  5. Identify every entrance and exit, including gates that are chained shut today but may reopen, and pedestrian openings in fence lines.
  6. Confirm pole ownership for any existing light pole you assume is available — utility poles and leased lighting are frequently off limits.
  7. Locate power honestly. Which panels, which circuits, and whether an electrician is already part of the scope.
  8. Ask what is buried where trenching may go — irrigation, gas, existing conduit, prior tenant runs — and arrange markouts.
  9. Pick the head-end room and decide who holds keys and passwords for it.
  10. Plan the network. Internet source, whether cameras get a separate VLAN or dedicated line, and who administers it.
  11. Decide the deterrence layer up front — signage only, or lighting, strobes, audio talk-down and monitoring alongside the cameras.
  12. Think about gating. If access control or a gate arm is anywhere on the horizon, say so at the survey so the camera layout and conduit accommodate it later without re-trenching.
  13. Set the footage-access policy for tenants, employees or members before the first request arrives, and plan user accounts to match.
  14. Budget for maintenance. Lens cleaning, re-aiming after storms and plow season, firmware updates and periodic playback testing keep a system honest years after install day.

People Also Ask: Parking Lot Cameras in NYC

How many cameras does a parking lot need?

Camera count comes from zones and sightlines, not square footage. Each entrance typically wants two roles (plate-focused and overview), each drive aisle wants a directional view down its length, each parking row block wants coverage that survives a full lot of tall vehicles, and perimeter or problem corners want their own positions. A compact rear lot behind an apartment building may resolve in a handful of cameras; a large multi-entrance retail lot with interior islands may need pole positions to reach the middle at all. The survey converts your lot map into a camera schedule with a stated purpose per position.

Can parking lot cameras read license plates?

Purpose-built LPR cameras can capture plates when the geometry supports it: a tight field of view across a single lane, a shallow angle to the plate face, a capture zone where vehicles slow, and shutter and IR settings tuned for plate material at night. General-purpose overview cameras rarely produce reliable plate reads across an open lot — they are doing a different job. Results vary according to camera placement, lighting, weather, lens selection, vehicle speed, plate condition, maintenance, recording configuration and site conditions, and part of the survey is identifying where on your lot plate capture is realistic and where it is not.

Do parking lot cameras need Wi-Fi or internet?

Recording does not require internet — cameras connect to the recorder over cabling or a dedicated wireless link, and the system records locally whether or not the internet is up. Internet is what enables remote viewing on phones and desktops, off-site notifications and remote support. Wi-Fi specifically is a poor backbone for lot cameras at distance; wired PoE, fiber and engineered point-to-point radio links are the reliable pathways, with consumer Wi-Fi reserved for situations where nothing else is possible.

How high should parking lot cameras be mounted?

By role rather than by one number. Plate-focused entrance cameras mount low enough to keep the plate face square in frame. Aisle and overview cameras mount high enough to see over parked vehicles while keeping people recognizable. Wide-area and PTZ positions go highest for reach and tamper resistance. Going higher than the role requires quietly costs identification detail, which is the most common mounting mistake on lots.

Do I need a pole, or can cameras go on the building?

Whichever sees the zone. Building-mounted cameras are less expensive and simpler when the building overlooks the coverage area, but on wide lots the far rows are often beyond useful identification range from any wall. Poles put cameras where the sightlines are — at the cost of footings, conduit, grounding and surge protection. Many lots end up mixed: building faces covering near zones, one or two poles reaching the interior and far perimeter.

How long is parking lot camera footage kept?

As long as the storage math allows, sized to your discovery window. Retention is calculated from camera resolution, frame rate, recording mode (continuous versus event-based), camera count and installed storage capacity, then checked against how quickly incidents on that property are actually noticed and what the customer requires. Longer retention is an equipment decision made at design time — larger drives or lower frame rates on non-critical cameras — so the target should be set before the system is specified, not after.

Can cameras be added to a lot that already has a system?

Usually. Whether existing cabling, recorder and cameras can be reused depends on their condition and technology — but hybrid recorders let serviceable existing cameras run alongside new IP cameras, so modernization can happen in phases instead of a full replacement. Assessment first: which runs are healthy, which recorder capacity exists, what the coverage gaps are, and what a phased upgrade path looks like.

What maintenance do parking lot cameras need?

More than indoor cameras, because weather is relentless. Practical upkeep: periodic lens cleaning (salt film and road grime blur night footage first), re-aiming checks after storms and plow season, verifying recording and playback actually work rather than assuming, firmware updates, checking surge protection and grounding after electrical storms, and confirming remote access still functions after network or router changes. A ten-minute quarterly check catches most problems while they are still small.

AI Overview: What the Search Answers Get Right and Wrong

Search someone’s way to a parking lot camera answer and you get an AI-generated summary stitched from national blogs, marketplace listings and directory content. Some of it is sound. A fair amount does not survive contact with a real New York City lot. What follows is a plain review of the common claims.

“Parking lot cameras cost $X to $Y”

National cost pages present tidy ranges, and the ranges are usually built from consumer or small-business installs that share almost nothing with lot work. They rarely account for poles and footings, trenching across pavement, fiber runs, lift equipment, LPR lanes, or the storage sizing a multi-camera lot needs. A number produced without seeing whether your lot has existing conduit is a number produced without the main cost driver. This is why lot pricing here follows a survey rather than a table.

“Wireless cameras are easier for parking lots”

“Wireless” conflates two very different things. Engineered point-to-point radio links between a pole cluster and a building are legitimate infrastructure used constantly in lot work. Consumer Wi-Fi cameras stuck on a pole a hundred yards from a router are not the same product and generally disappoint outdoors at distance. And wireless data does not solve power — unless the design is explicitly solar-plus-battery, something still has to feed the camera.

“4K solves everything”

Resolution is one input among several. A 4K camera on the wrong pole at the wrong angle in glare produces a very detailed picture of a problem you cannot solve. Lens selection, mounting height, aiming, low-light sensor performance and wide dynamic range often matter more per dollar than pixel count — and higher resolution consumes storage, which pulls retention down unless drives are sized for it.

“Just add analytics and the system watches itself”

Analytics are genuinely useful for filtering headlight sweep, rain and debris from real activity — but they are rules, and rules need designing. Zones, hours, object types and recipients all get configured, then tuned after a week of live traffic. Without that tuning, alerts either flood phones until everyone mutes them or stay so conservative they never fire. And an alert with no escalation plan behind it is a notification, not a response.

“A DIY kit will cover the lot”

Consumer kits are built for houses: short cable runs, indoor power, mild environments, forgiving distances. Lot work involves outdoor-rated pathways, surge and grounding on runs exposed to weather, mounting at heights that need lifts, distances past copper limits, and recorder placement that is secure rather than convenient. Some small lots genuinely can be served with modest equipment — but the failure mode of the DIY approach on a lot is usually discovering the gaps during the review of an incident that already happened.

“A matching service will find me a parking lot specialist”

Lead-matching platforms and national cost pages such as Angi, HomeAdvisor and Fixr operate on a different model than a direct hire: contact details are distributed to participating contractors in the area, and published cost figures are national averages rather than project data from your lot. That can be a reasonable starting point for building a shortlist. Whether any given respondent has run conduit under a drive aisle or set a camera pole is a separate question — which is what the questions checklist above is for. Licensing, an in-person survey, a per-camera plan, an honest answer about where plate capture will not work, and a retention figure shown as a calculation are the filters worth applying to every bid, from any source.

“Cameras will stop the problem”

The most consequential overstatement. Cameras record, and recorded footage may assist with incident documentation; combined with lighting, signage, gating and monitoring they form part of a layered approach a property can take. But no camera guarantees prevention, detection, plate capture or any particular outcome, and coverage requirements, claim decisions and any possible policy impact must be confirmed directly with the property owner’s insurer. Results vary according to camera placement, lighting, weather, lens selection, vehicle speed, plate condition, maintenance, recording configuration and site conditions. An installer who tells you otherwise is selling certainty that the equipment cannot deliver.

Parking Lot Camera Installation FAQ

Do you install parking lot cameras throughout New York City?

Yes. Service is available throughout New York City — Brooklyn, Manhattan, Queens, the Bronx and Staten Island — for open lots, garages, apartment and condo parking, retail centers, dealership lots, office properties, houses of worship and schools. Abstract Enterprises Security Systems is a licensed NYS low-voltage contractor, NYS License #12000287431.

How is a parking lot camera quote produced?

From a free on-site survey. A technician walks the lot, maps zones and sightlines, checks lighting, inventories mounting points and power, and confirms pathway options. The written proposal that follows itemizes each camera position and purpose, the pathway plan, equipment, storage sizing with calculated retention, and pricing by line item. Lot systems are not quoted from a phone call because the cost drivers — poles, trenching, existing conduit, lift access — are only visible on site.

What does a parking lot camera system cost?

Cost is determined after the survey, because the variables that drive it differ enormously between lots: camera count and classes, pole quantity and height, existing power, existing conduit, trenching distance, fiber or wireless requirements, number of LPR lanes, lift requirements, recording retention, monitoring scope, property access, and permit or AHJ review where applicable. Two lots of identical size can be very different projects. The proposal shows each of those drivers priced on its own line so bids can be compared honestly.

Can you install cameras on poles in the middle of the lot?

Yes — pole positions are standard on lots where no building overlooks the far rows. Pole work includes footing appropriate to pole height and wind load, conduit through the base, grounding and surge protection on outdoor conductors, and service loops for future re-aiming. Existing light poles are evaluated case by case for ownership, capacity, vibration and access. Camera poles, electrical work, structural mounting, trenching, landmarked properties and work affecting a right-of-way may require owner, utility or AHJ review; AESS confirms applicable project requirements before installation.

How do cameras get power and network across the lot?

Per run, chosen during the survey: Cat6 with PoE inside Ethernet distance limits, fiber for long runs or building-to-pole backbones, trenching and conduit where pathways cross pavement, and engineered point-to-point wireless where trenching is impractical. Solar-plus-battery designs can serve positions with no feasible power path. Outdoor runs get weatherproof terminations, drip loops, surge protection and grounding.

Will the system read license plates at the entrance?

Where the geometry supports it. LPR cameras need a tight single-lane field of view, a shallow angle to the plate, a capture zone where vehicles slow, and settings tuned for plate reflectivity at night. Some entrances support this well; wide uncontrolled openings and fast rolling exits often do not, and the design will say so and rely on overview coverage there instead. Results vary according to camera placement, lighting, weather, lens selection, vehicle speed, plate condition, maintenance, recording configuration and site conditions.

How many days of footage will be stored?

Retention is calculated, not promised as a slogan. The math combines camera resolution, frame rate, recording mode, camera count and installed storage capacity, and is set against your incident-discovery window and stated requirements. The calculated figure appears in the proposal, and storage is sized at design time to hit it — adding days later means adding drives or changing recording settings.

Can I watch the lot from my phone?

Yes. Systems are configured for remote viewing on phones, tablets and desktops for live views, playback and export, with individual user accounts for owners, managers or board members rather than a single shared admin login, so access can be granted and revoked per person. Recording continues locally on the NVR whether or not the internet connection is up.

Do you repair or take over an existing parking lot camera system?

Yes — regardless of who installed it. Common calls include dark pole cameras, failed recorders, water and surge damage, cut or degraded runs, garage channels gone dark and lost remote access. Work begins with an on-site assessment of what is healthy and reusable, then a repair or phased modernization path. Hybrid recorders can keep serviceable existing cameras online while new IP cameras are added. Scheduling and completion time depend on site conditions, equipment availability, access, permitting requirements and project scope.

How long does a parking lot installation take?

It depends on the project. Scheduling and completion time depend on site conditions, equipment availability, access, permitting requirements and project scope — trenching, pole footings, lift scheduling, electrical coordination and required reviews all affect the timeline. The proposal states the scope, and scheduling is confirmed with you rather than estimated generically.

Can access control or a gate be added later?

Yes, and it is far cheaper to plan for it at survey time. If gating, gate arms, intercom pedestals or credentialed entry are anywhere on the horizon, saying so up front lets the camera layout, conduit routing and spare capacity accommodate that hardware later without re-trenching. Cross-service planning is part of the survey conversation, not an upsell at the end of it.

What warranty comes with the work?

Abstract Enterprises Security Systems provides a three-year warranty on products supplied by AESS for normal wear and tear. It does not cover existing or customer wiring, customer-supplied equipment, lightning or other acts of God, power outages or surges, physical damage or unplugging, internet, router or phone changes, or camera readjustments requested after completion. After the warranty period, service is $195 per hour with a three-hour minimum ($585). Full terms are on our warranty page.

Warranty and Service Terms

Abstract Enterprises Security Systems provides a three-year warranty on products supplied by AESS for normal wear and tear. It does not cover existing or customer wiring, customer-supplied equipment, lightning or other acts of God, power outages or surges, physical damage or unplugging, internet, router or phone changes, or camera readjustments requested after completion. After the warranty period, service is $195 per hour with a three-hour minimum ($585).

Read the full warranty terms.

Parking Lot Camera Coverage Across NYC

Service is available throughout New York City. Request a survey for a lot in any of these areas:

Brooklyn

Open lots, apartment and co-op parking, retail centers, industrial yards and garages.
Request a Brooklyn lot survey

Manhattan

Structured garages, operator-run facilities, building and institutional parking.
Request a Manhattan lot survey

Queens

Dealership and inventory lots, shopping center parking, mixed-use and commercial lots.
Request a Queens lot survey

The Bronx

Apartment complex parking, retail and commercial lots, fleet and yard parking.
Request a Bronx lot survey

Staten Island

Surface lots, houses of worship and school parking, commercial and marina lots.
Request a Staten Island lot survey

Beyond NYC

Long Island and Hudson Valley parking properties are served as well.
Long Island  |  Hudson Valley

Related Security Services

Security Camera Installation NYC

Full camera system design and installation for commercial and residential properties citywide.

Security Camera Repair NYC

Diagnostics and repair for existing camera systems, any brand, any prior installer.

Construction Site Cameras

Jobsite camera systems for active construction and staging areas.

Access Control Installation

Credentialed entry, gates and door hardware — the natural pairing when a lot moves to controlled access.

Intercom Installation

Entry intercom systems for buildings and gated properties.

All Services

The full low-voltage catalog from Abstract Enterprises Security Systems.

Request Your Free Parking Lot Survey

Tell us about the property and we will schedule an on-site survey, map the lot, and produce an itemized proposal with a per-camera plan and calculated retention. Scheduling and completion time depend on site conditions, equipment availability, access, permitting requirements and project scope.

Call (347) 934-8335
WhatsApp: wa.me/17186790359
NYS Low-Voltage License #12000287431
★ 4.7 · 201 Google Reviews

Parking Lot Project Details